Pages

Friday, May 31, 2013

Coconut Oil Granola


I purchased a tub of Coconut Oil at Costco and have enjoyed finding recipes that include it. So far I have been very happy with this new find! I Googled, 'granola using coconut oil', several recipes appeared. Google is great. I read over many recipes and this was what I came up with. I love making granola--I have several recipes on my blog--all delicious I might add. Here is another granola recipe to add to the group! It is yummy.


Coconut Oil Granola
4 cups oats
3/4 cup sliced almonds
3/4 cup walnuts, coarsely chopped
1 cup unsweetened coconut curls
1/4 teaspoon salt
1 teaspoon cinnamon
1/2 teaspoon cardamom
1/2 cup coconut oil
1/4 cup honey
1/4 cup brown sugar
1 tablespoon maple syrup
1 tablespoon vanilla
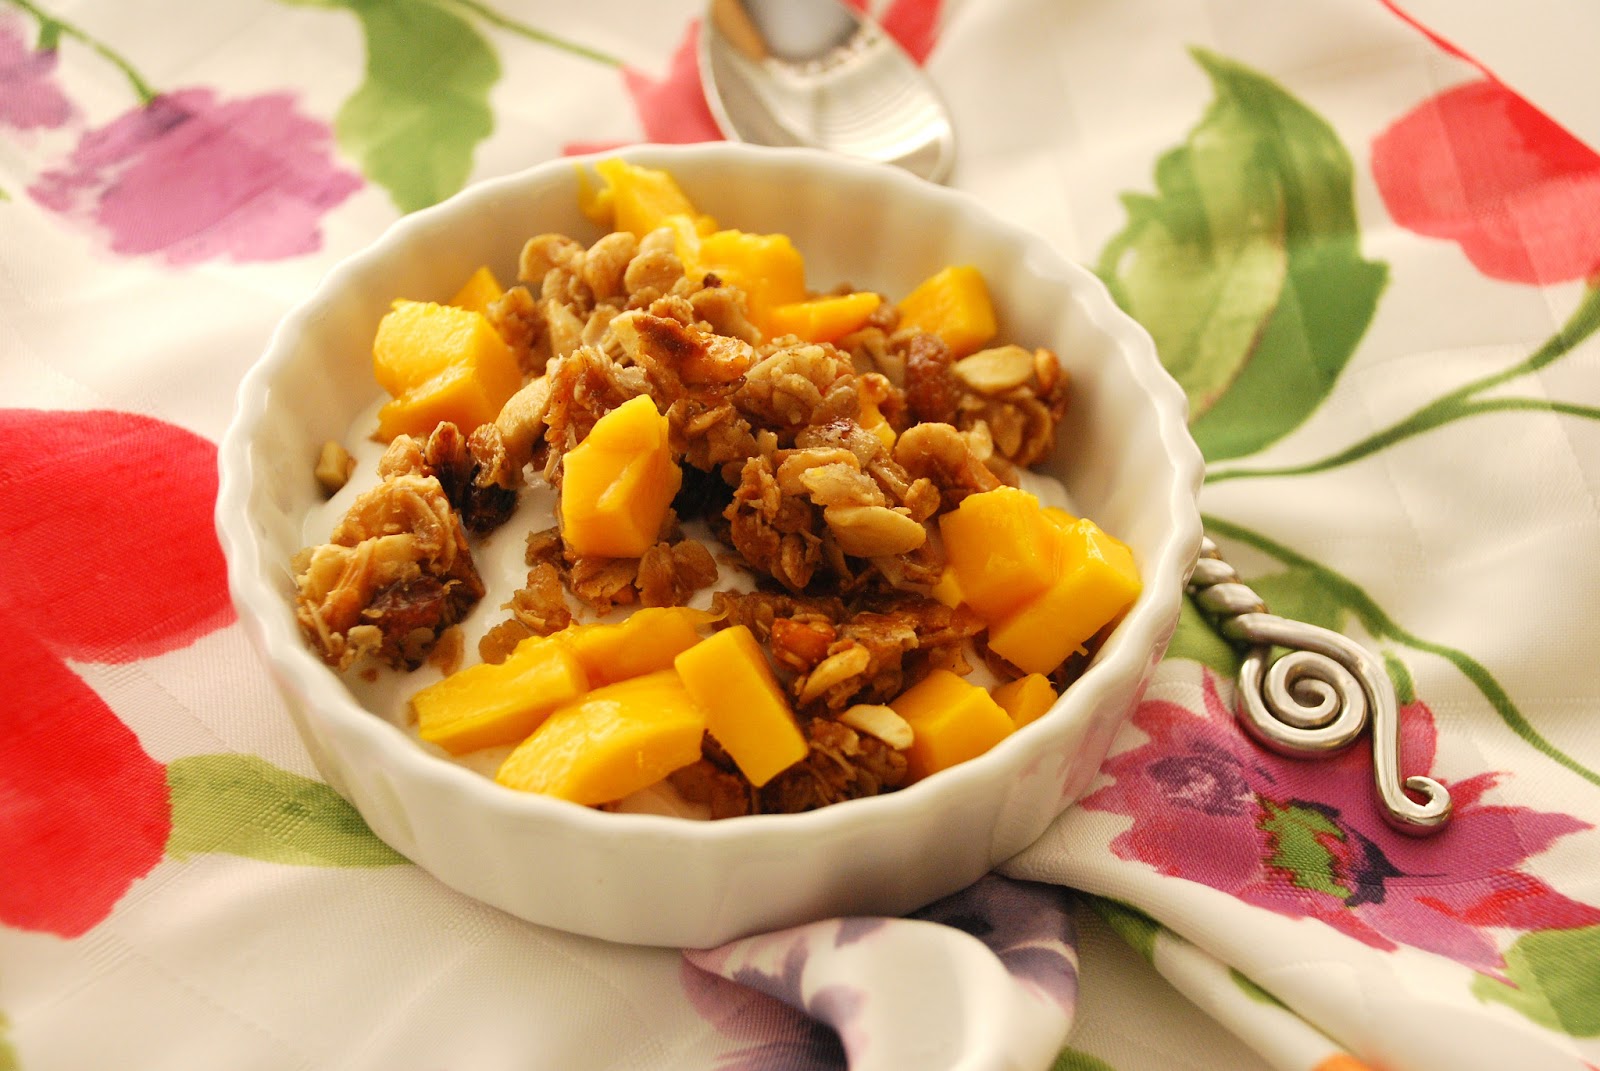
Mix oats, nuts coconut, salt, cinnamon and cardamom in a large bowl. In a small saucepan melt coconut oil, brown sugar, honey, maple syrup and vanilla. Pour over oat mixture and stir. Pour on a sheet pan and bake at 325 for about 25 minutes. Stir often. Cook granola until desired crispness. Granola will continue to get crisp as it cools. Be careful--it is easy to overcook! Enjoy with yogurt, fruit or milk.I just had some of this granola sprinkled on a bowl of vanilla ice cream--it is delicious, I know!
Printable Recipe

Monday, May 27, 2013

Coconut Macaroons--Gluten Free


I have mentioned this before, but my daughters and I love to share recipes.  It isn't uncommon for several of us to make the same recipe in any give week.  We don't share time zones but we enjoy sharing recipes! Amber made this recipe and e-mailed Candise and said this was a must make--it is gluten free and delicious.
I made it for Lynne my sister-in-law who loves all things coconut. It was a hit! This recipe proves that you can bake delicious and gluten free! Thanks A Dash of Sass for a great recipe.

Coconut Macaroons
3 cups sweetened flaked coconut
1 cup slivered almonds
2/3 cup sweetened condensed milk
1 teaspoon vanilla
2 egg whites
pinch salt
chocolate
Toast coconut and almonds on a sheet pan at 350 for about 12 minutes until lightly toasted. Watch carefully, coconut goes from golden to burnt in seconds (how would I know that??) Cool.
Combine sweetened condensed milk and vanilla, stir in coconut and almonds.
In an electric mixer beat egg whites and salt till stiff but not dry. Gently fold egg whites into coconut mixture. Using a cookie scoop that has been sprayed with Pam scoop batter onto a parchment lined cookie sheet that has been sprayed with Pam.
Bake at 350 for about 14 minutes or until edges of cookies are light golden brown. Cool on cookie sheet. 
When cool dip bottom of cookie into melted chocolate, place on parchment paper. Drizzle top of cookie with melted chocolate. I used dark chocolate but milk or white would also be delicious. This cookie tastes just like an Almond Joy (only better), leave out the almonds and you have a Mounds bar. These cookies were a hit. I will make them again!

Saturday, May 25, 2013

It's a Craft! Classy Cake Plate


We had a Girls Weekend last week. Jess was kind enough to bring the supplies to make this  darling cake plate. I often see cute project like this on Pinterest--I might even pin them. But Jess actually purchased the supplies AND we finished them! I will admit I do have a few unfinished projects.


But this project was easy and quick and the results were very classy. Jess purchased the plates and cups from Tai Pan (yes, you could use cups and plates from Goodwill). The most difficult part of the project was getting the price tags off! We finally resorted to Goo Gone to finish the sticky job. We then used a Gorilla Epoxy to glue the cup to the plate.
The results were darling. Thanks Jess for sharing a fun project with us.

Look for these yummy Chocolate Sugar Cookies on my blog next week!

One Year Ago------Just Delicious Meat Loaf
Two Years Ago-----Thick and Chewy Cookie Bars
Three Years Ago----Banana Coconut Ice Cream Pie
Four Years Ago-----Cheesecake Bites

Linked to The Creative Home Acre

Wednesday, May 22, 2013

Best Brownies


 The Best Brownie Recipe Ever
Really--the best brownie recipe ever? Could that be. There are many types of brownies, chewy, cakey, with nuts, without nut, with add ins, frosted or without frosting. How could one brownie be the best ever. Well I had to try it because I only have 27 brownie recipes on my blog and I certainly could use another.
This recipe called for browned butter--already moving up the scale fast. It uses cocoa--another plus as I always have some in the house. The recipe is made in one pan, sounding better all the time. The recipe did call for almonds but I had some roasted peanuts which I thought would go well with the nutty flavor of the browned butter. Well--are they the best ever? I served them at girls weekend and had many harsh brownie critics. They all gave this recipe a thumbs up! So yes go ahead and try it. See if it is your Best Brownie Recipe Ever!

The Best Brownie Recipe Ever
10 tablespoons butter, cut in 1 inch pieces
1 1/4 cup sugar
3/4 cup unsweetened cocoa
2 teaspoons water
1 teaspoon vanilla
1/4 teaspoon salt
2 large eggs, chilled
1/3 cup plus 1 tablespoon flour
3/4 cup chopped dry roasted peanuts or walnuts
Melt butter in a medium saucepan over medium heat. Cook until foaming stops and brown bits form on the bottom of the pan--watch closely and stir often. Brown butter turns to black butter in seconds! Remove from heat, immediately add sugar, cocoa, water, salt and vanilla. Stir to blend.  Let cool for 5 minutes.
Add the eggs to the hot mixture 1 at a time, beating vigorously to blend after each addition. 
When the mixture looks thick and shiny add flour and stir until blended. Beat vigorously 60 strokes. Fold in nuts.
Line a 8 inch square pan with foil leaving a 2 inch overhang. Spray foil with Pam. Spread thick batter in pan. Bake at 325 for 25 to 30 minutes.
 Check brownies by inserting toothpick, a few moist crumbs might stick to the toothpick. Cool in pan on rack. Using foil overhang lift brownies from pan. Cut into squares and enjoy!
Is it your Best Brownie?? I found recipe on The Tasty Fork who found it on Bon Appetit 
Printable Recipe

1 year ago--------Thai Chicken Pizza

2 years ago-------Party Chicken Salad Sandwiches
3 years ago----- -Peanut butter Bars--Scott's favorite treat of all time!!
4 years ago-------Broccoli Salad

Linked to the Creative Home Acre Hop

Loaded Rice Krispie Treats for the Girls and it's Gluten Free!


A Rice Krispy Treat is a pretty lowly affair--but not for girls weekend! We added peanut butter because we can. We then went crazy with our drizzle. If one kind of chocolate is good--3 kinds will be amazing. So we used milk chocolate, dark chocolate and white chocolate. Yes, they made a delicious combination.

Loaded Rice Krispy Treats
40 or 4 cups marshmallows
5 tablespoons butter
1/3 cup peanut butter butter
Mix together in Microwave till creamy and smooth. Add 5 cups of Rice Krispy  and 1/2 cup of white chocolate chips. Pat into a buttered or sprayed 8 inch square pan. This will make a thick treat. Putting in a 9x13 inch pan will make a thinner treat. When cool remove from pan and cut into desired shapes. Drizzle with chocolate! I use chocolate melting wafers purchased in bulk from WinCo. These have a great flavor and dry quickly. I melt about 1/4 cup melts in a small zip lock baggie. Heat in 30 second intervals, knead chocolate in package. When completely melted snip a very small corner off the baggie and use this to drizzle--yes it really does work!
Printable Recipe

Sunday, May 19, 2013

Pork Baby Back Ribs--by Jeff


Please welcome my brother-in-law Jeff as a guest cook. We were at a family party last week and Jeff raved about this awesome recipe he had for ribs. Now I don't often cook ribs so I was more than happy to turn some time to Jeff.  Thanks Jeff for sharing a family secret!

Jeff's Baby Back Ribs
 We love pork baby back ribs.  This super-simple recipe allows us to make BBQ succulent baby-back ribs all year-around.
Make sure you start with quality pork baby-back ribs.  These ribs came sealed and frozen from Macey's of Orem and were a frugal $2.99 / lb.  Thaw and remove the ribs from the plastic.  Rinse the ribs under tap water and place on the cutting board.  Using paper towels, thoroughly dry both sides of the baby-back ribs.  Now using a sharp knife, cut the rack of ribs into portion sizes of 3-5 ribs each. 

I've modified this dry rub recipe to our family's taste.  Sometimes I will double the recipe and keep half the batch in a zip-lock bag for future use.

1/4 cup light brown sugar
1/4 cup paprika
3 T black pepper
3 T kosher salt
2 t garlic powder
2 t onion powder
2 t celery seed
1 t cayenne pepper

If you'd like the rub less spicy, reduce black pepper to 3/4 T and use only half of the cayenne pepper.

Thoroughly mix all of the ingredients together in a bowl to make the dry rub.  Sprinkle the rub on one rib portion at a time, rubbing the rub into the meat.  Cover all sides of the rib portion and place in the crock pot.  Do not add any liquid to the crock pot.  Some recipes call for 1/2 can of soda, beer or 1/2 cup of apple juice/cider.  I've found that enough of the pork juices will render in the cooking process to keep the ribs moist.  Cook the ribs on High in the crock pot for 6 hours or on low for 8 hours. 

When the ribs are done, I move the rib portions to a cookie sheet covered with tin foil, shiny-side out.  Set the oven to broil.  Now using a clean brush, paint all of the top side of the ribs with BBQ sauce.  Place the ribs under the broiler for 2-4 minutes.  You have to watch the ribs and just allow the BBQ sauce to glaze onto the ribs.  Now move the ribs onto the stove top or onto pot holders.  With tongs, turn the ribs over to the other side.  Paint this side with BBQ sauce and back into the over for 2-4 minutes to glaze the other side.  Now the ribs are ready to serve.  They go great with my wife's terrific potato salad or our signature baked beans. 

Thanks again Jeff for this delicious recipe. I appreciate the step by step photos--they will be on my menu soon!

Wednesday, May 15, 2013

Coconut Lime Scones


I love it when you pin a recipe, make it and it turns out better than you imagined. I saw this recipe at Krista's Blog, A Handful of Everything. I love scones, lime and coconut and the fact that this recipe used coconut oil was a plus. I bought a tub of Coconut Oil at Costco and am anxious to use it. The coconut oil and coconut gave these scones a great flavor and texture--the lime just added to their goodness.
I made them for Mother's Day and I will probably make them again this weekend for my girls. They are delicious. Thanks Krista for this great recipe--I made a few small changes because that's what bloggers do!


 Coconut Lime Scones
1/4 cup sugar
zest from 1 lime
1 1/2 cup flour
1/4 teaspoon salt
1 1/2 teaspoon baking powder
1/4 cup coconut oil
1/2 cup shredded coconut
2 tablespoons lime juice
3 tablespoons cream
1 egg
coarse sugar
Put sugar in a bowl and add lime zest--rub the sugar and zest between your fingers. It will smell wonderful. Add flour, salt, and baking powder. Stir to combine, add coconut oil and cut in with 2 knives or a pastry blender. You will have coarse crumbs. Add the coconut and stir. Mix together the lime juice, cream and egg. Add to dry ingredients, stir gently. Dump shaggy mixture on a Roll'Pat and knead gently just till mixture comes together. Do not over mix. The less you handle scones the more tender they will be. Pat in a circle about 6 to 8 inches. Cut into 8 wedges. Brush top of scones with cream and then sprinkle coarse sugar on top. Place scones on a stone or sheet pan, wedges should be about 2 inches apart. Bake at 425 for 11-13 minutes. Do not over cook. Edges may start to turn light brown but you don't want brown bottoms!
Remove from pan and place on cooling rack. When scones are just cool drizzle with glaze. Serve soon.
You can also freeze the scones before they are baked, flash freeze and then place in a freezer baggie. Cook frozen scones at 425 for 11-13 minutes, use within a month.
Glaze
zest from 1 lime
1 cup powdered sugar
lime juice to desired consistency
Printable Recipe

Friday, May 10, 2013

Taco Chopped Salad


I wish I could say that my weekly menu plans were chosen from all the fun foods on my Pinterest boards. But really it is something like this: I look in the pantry, fridge and freezer and see what needs to be used. This week I had a half a bag of my favorite tortilla chips that somehow got crushed, a few olives, and 2 heads of romaine that were screaming 'use me'! I also had some shredded cheese and some freshly made Cracked Pepper Dressing. This looked like the perfect week to have Taco Salads!
Chopped Salads make a stunning presentation. And as I tell my girls--presentation is everything. Chopped Salads are great for picky eaters; they don't have to eat the tomatoes or beans or whatever they don't like.
So here is my version of:

Taco Chopped Salad:
1 pound ground beef
1 onion
1/2 cup Catalina Dressing
1/4 cup water
1 teaspoon chili powder
1 can black beans, drained and rinsed
Brown ground beef and onion, season with salt and pepper. Add dressing, water, chili powder and beans, simmer for a few minutes, adding more dressing or water to taste.
On a large platter make rows of:
shredded romaine
spinach
chopped tomatoes
shredded cheese
diced avocado
matchstick carrots
cucumber
chopped red pepper
any other veggies that sound good
tortilla chips or Frito's
ground beef and bean mixture 
Serve with Ranch or Cracked Pepper Dressing
Printable Recipe 


Tuesday, May 7, 2013

TWD/BWJ Rhubarb Baby Cakes


While Rhubarb Baby Cakes may not win a beauty pageant they do taste delicious! This sweet cake starts out with a brown sugar caramel sauce and chopped pecans.  Thin slices of rhubarb are layered over the pecan/caramel sauce. Top all of this goodness with yummy cake batter. This bakes into a delicious little cake with tart rhubarb and sweet pecan caramel sauce on top.
You can make this recipe with any kind of fruit--think apple, peach or how about blueberries? This is a baby cake but you can also make the cake in a larger cake or spring form pan. The possibilities are endless.
Check Erin's blog for the complete recipe. Then check the TWB/BWJ  LYL and see what other bakers did with this recipe.

Sunday, May 5, 2013

Vietnamese Summer Roll Salad


Thai Chicken Salad is a family favorite--but I think we may have a replacement! This salad has all the element of delicious Spring Rolls only in a salad form--what could be better. It is gluten free, has little fat but is very high on flavor. Vietnamese Summer Roll Salad will make it on my menu often this summer. Please do try it. The prep took a few minutes but the shrimp cooks up in a minute and it is ready to eat. There are complete detailed recipe instructions on Tasty Kitchen. But here are the basics and our adaptations.

Vietnamese Summer Roll Salad
8 ounces Mai Fun glass noodles, thin
2 whole shallots, sliced thin
1 tablespoon coconut oil
1/2 pound shrimp, deveined and shelled
1/2 cup fish sauce
3/4 cup rice wine vinegar
2 tablespoons grated ginger
1/2 teaspoon red chili flakes
2 tablespoons honey
1 whole cucumber, partially peeled and cut in match stick pieces
2 peeled carrots, julienne
1/2 of a large red pepper, cut in match stick pieces
1 cup bean sprouts
1 cup finely shredded cabbage or Napa
1/2 cup chopped basil
1/2 cup chopped cilantro
1/2 cup chopped peanuts
fresh lime wedges 


Make the dressing by combining the fish sauce, vinegar, ginger, chili flakes and honey in a small bowl, whisk together.

Put dry noodles in a bowl, pour boiling water over noodles and let sit in the water until noodles are tender, about 6-8 minutes. Drain noodles and rinse with cold water, drain again.
Heat coconut oil over medium high heat and add shallots. Cook shallots until golden brown, remove from pan. Add shrimp to the hot pan and cook for about 3-4 minutes--don't overcook. Remove shrimp from the pan. 
Assemble the salad in a large bowl by combining the cucumber, carrot, bean sprouts, red pepper, noodles and cabbage. Toss to combine. Add the basil and cilantro, shallots and peanuts. Top with shrimp. If you are going to consume the entire salad add the dressing and toss. Serve with lime wedges. This salad will feed about 6 main dish servings. You can also serve the dressing on the side--this way the salad will keep in the fridge for a day or two.
Printable Recipe

1 year ago-----Potatoes Au Gratin in a Crock Pot
2 years ago----Baked Creamy Pork Taquitos
3 years ago----Salsa--Quick
4 years ago----Amazing Chocolate Toffee Sugar Cookies
Linked to The Creative Home Acre Hop

Saturday, May 4, 2013

Fire Station Fun!

Cedar Hills gets a new big fire truck, this calls for a small town celebration. Complete with displays, speeches, hot dogs and many photo ops. EJ had a great day!


Friday, May 3, 2013

Olive Oil Granola


I have tried many granola recipes--you will find several on my blog--all delicious. But I had not tried granola that contained olive oil so of course I had to. Now I have another granola recipe that I love. This granola has plenty of sweetness: honey, pure maple syrup and brown sugar. It is flavored with cinnamon and cardamom, nuts and dried fruit round out the list of ingredients.
This granola stayed in chunks (maybe because of the egg white?) which I like--it is much easier to snack on. You also add the dried fruit before you cook it so the fruit is stuck to the yummy chunks of goodness. I liked it and will certainly make it again. I found it while looking at quilt blogs. It was a fun surprise in the middle of beautiful quilts!


Olive Oil Granola
4 1/2 cups old fashioned oats
1/2 cup extra virgin olive oil
1/2 cup brown sugar
1/4 cup honey
3/4 cup pure maple syrup
1/2 teaspoon salt
1/2 teaspoon cinnamon
1/2 teaspoon cardamom
2 cups nuts/seeds (I used raw cashews and slivered almonds)
3/4 cup dried fruit (I used King Arthur Flour's Fruit Cake Blend--best dried fruit on the planet)
1 egg white
Mix all ingredients except egg white in a large bowl stir until all the sweetness is incorporated. Whisk egg white and add to mixture, stir. Pour mixture on a sheet pan that is covered with parchment paper.
Bake at 325 for about 45-50 minutes, stir every 15 minutes. It will firm as it cools.
Serve on plain Greek Yogurt with fresh berries. It also makes a yummy snack.
 Thank you Crazy Mom Quilts for this fun recipe. She also has some amazing quilts to drool over.
Printable Recipe

Wednesday, May 1, 2013

Strawberry Rhubarb Crisp


It has been a long cold winter in Utah. We had our first 70+ degree day yesterday, looks like spring just might make it. I looked out my kitchen window to our barren garden space and I think overnight our rhubarb plant shot up. I did a close up and realized the rhubarb was perfectly tender and ready to turn into a yummy dessert. My sweet Mother-in-Law Geneel was coming to dinner and I know she loves rhubarb. This was the perfect dessert to top off our meal of Teryaki Salmon and Orzo Pasta. We are one happy family!

Strawberry Rhubarb Crisp
2 cups fresh rhubarb, 1/2 inch slices
2 cups strawberries, hulled and quartered
3/8 cup sugar
zest from 1 orange
1/4 cup fresh squeezed orange juice
1 tablespoon cornstarch
Mix together strawberries, rhubarb, orange zest and sugar. Combine cornstarch with orange juice and stir. Pour over fruit and stir to combine. Put mixture in 8 inch round baking dish--I'm sure an 8 inch square pan would work too. 
Topping:
1/2 cup flour
1/4 cup sugar
1/4 cup brown sugar
1/4 teaspoon salt
3/4 cup quick oatmeal
6 tablespoons cold butter, sliced
Mix together dry ingredients and cut in butter with a pastry blender or your fingers until the mixture is in crumbles. You could use your food processor or mixer but I didn't want to dirty them. It was easy to mix by hand. Sprinkle the topping over the fruit mixture completely covering. Bake at 350 for about an hour or until the fruit is bubbling and the topping is golden brown. Serve warm with whipped cream or ice cream.
Print Recipe 

I did a Google search for Strawberry Rhubarb Crisp. A recipe by Ina Garten was the winner. It had 42 reviews and almost all were 5 stars. I read the comments and made a few adjustments. I also cut the recipe in half as I wasn't feeding a small army! This recipe would easily feed 4 to 5 adults. I would certainly make this again, we all gave it 5 stars. Next time I will add some chopped walnuts to the topping. The tasty dish will be made often this summer.