Pages

Thursday, January 23, 2014

Dulce de Leche Brownies made by Amber


 Beautiful Photography by the talented Amber Linderman Photography
I have mentioned before that my gals are great cooks--we live miles apart but we are always sharing menus, food ideas and new recipes. This recipe comes to us from David Lebovitz-a foodie that resides in London.
Amber made it, was amazed and promptly sent pictures out to each of us--to share the recipe and to make us slightly jealous that we weren't eating this yummy confection! I think it worked--we will all be making this before the weekend is up. One slight change--Amber opted to spread the nuts on the top of the finished brownie. That way she can please even those who aren't fond of nuts. Brilliant idea Amber.
On to the recipe:

Dulce de Leche Brownies--from Amber
8 tablespoons butter, diced
6 ounces bittersweet or semi-sweet chocolate, chopped
1/4 cup Dutch Process Cocoa Powder, Unsweetened
3 large eggs
1 teaspoon vanilla
1 cup sugar
1 cup flour
1 cup toasted pecans or walnuts
1 cup Dulce de Leche

Line an 8-inch  square pan with a foil sling, spray with Pam. this will insure the brownies will not stick and will help in the removal of the brownies.
Melt the butter in a medium saucepan. Add the chocolate pieces and stir constantly over very low heat until the chocolate is melted. I have been know to do this step in the microwave. My microwave has a setting just for chocolate melting. I love it, I use it! Remove from heat/microwave and whisk in the cocoa powder until smooth. Add in the eggs one at a time, then stir in the sugar, vanilla and flour. Mix in the nuts or reserve for sprinkling on top. Now have fun!
Scrape half of the batter into the prepared pan. Drop one-third of the Dulce de Leche, evenly spaced, over the brownie batter, then drag a knife through to swirl it slightly. Spread the remaining brownie batter over, then drop spoonfuls of the remaining Dulce de Leche in dollops over the top of the brownie batter. Use a knife to swirl the Dulce de Leche slightly. Sprinkle nuts on top if desired.
Bake at 350 for 35-45 minutes. Brownies will be done when center feels just slightly firm. Cool completely. Remove from pan, remove foil. Cut into smallish squares--they are rich. Enjoy!
Printable Recipe


You might also like:
Packable Brownies
Ghirardelli Classic Brown Sugar Brownie
Peanut Butter Cup Blondie
White Chocolate Browned Butter Blondie
Secret Recipe Club Brownie--Danielle's Brownie

Monday, January 13, 2014

Oreo Cheesecake Bites ala Jess


My sweet Daughter-in-Law Jess came to visit the other day. She brought dessert, she brought amazing dessert. We ate it and enjoyed every bite. Good job Jess. Dessert is always welcome at our home! This rich dessert feeds a crowd, it also keep well in the refrigerator for several days. Tightly wrapped it will keep for a month in the freezer. Wouldn't it be great to have a few goodies in the freezer for unexpected company--great idea!

Oreo Cheesecake a la Jess
36 Oreo Cookies
4 tablespoons butter
4 8 ounce packages of cream cheese--softened
1 cup sugar
1 cup sour cream
1 teaspoon vanilla
4 eggs
4 ounces semi-sweet melts--purchased at Winco or Gygis
4 ounces vanilla melts--purchased at Winco or Gygis
Line a 9x13 inch pan with foil--leave a 2 inch overhang--this will help in removing the bars. Spray the foil with Pam.
Finely crush 24 of the Oreos, add melted butter and combine. Press Oreo crumbs onto the bottom of the 9x13 pan, put in the freezer while mixing filling.
Beat the soften cream cheese till smooth. add sugar and mix well. Gently add sour cream and vanilla. Add eggs one at a time--beat gently after each addition. Coarsely chop the remaining cookies and fold them into the batter. Remove crust from the freezer--pour filling over crust. Bake at 325 for 35-40 minutes. Cheesecake is done when the sides are set and the center is almost set. Cool completely on a rack, When cool cover with plastic wrap and put in the refrigerator for 2 hours. When cold remove cheesecake from the pan using the foil over hangs--aren't you glad you left them! Remove foil and cut in bite size bars, these are quite rich so keep squares small. Put cheesecake bites on parchment paper. Put semi sweet chocolate melts in a heavy baggie. Melt in the microwave at 30 second intervals, knead the chocolate until it is melted and smooth. Cut a small hole in the corner of the bag and drizzle the chocolate onto the bars--have fun. It is good to drizzle! Repeat with the white chocolate. The chocolate will harden quite quickly but as with any good cheesecake the flavors will marry and be much better tomorrow. Tightly wrapped these bites will keep several days in the fridge. Wrapped tightly they will keep a month in the freezer. Thanks Jess
Printable Recipe
Inspired by Kraft

Tuesday, January 7, 2014

Coconut Lime Rice with Cilantro


This delicious rice stands on its own; adding coconut milk gives it a rich creamy flavor. I served it with a salmon dish but I'm sure it will taste great with Thai or even Mexican. Flavorful rice with a pop of lime, sides don't get much better!

Coconut Lime Rice
1 tablespoon olive oil
2 cloves garlic, pressed
1 cup Basmati rice
1 cup chicken broth
1 cup coconut milk
Sea Salt--to taste
1/2 cup cilantro
Juice from 1-2 limes
Heat oil in a saucepan add garlic and cook 1 minute--stir constantly.
Add rice and cook 4 minutes--stir often.
Add chicken broth, coconut milk and sea salt, bring to a boil, stir.
Reduce heat to simmer, cover and cook 20 minutes.
Remove pan from heat, let sit covered for 5 minutes.
Fluff rice, add cilantro and lime juice.
Enjoy!
Printable Recipe
There are many versions of this recipe. I based my recipe on one from The Love of Cooking, but I had to add lime juice because everything tastes better with a splash of lime! 

Monday, January 6, 2014

Low an Slow Cooked Salmon


I live in land locked Utah where fresh sea food usually isn't that fresh. But, I happen to have brothers that venture to Alaska each summer to fish. They bring back fresh salmon, halibut and shrimp and they are nice enough to share. Here is my latest attempt to cook salmon.
I have a delicious Teryiaki Salmon recipe that I make often but as a true foodie I am always looking for something better/different/new. And I found it! This recipe cooks salmon at a low heat for a longer period of time, it stays moist and delicious. Give it a try, it just may become you new favorite way to cook salmon.

Low an Slow Cooked Salmon
12 ounces of salmon that has been out of the refrigerator for 30 minutes--this makes 2 servings
Sliced orange and lemon
Zest of one lemon
1 shallot, chopped
2 tablespoons chopped parsley
2 tablespoons chopped basil, cilantro or other fresh herb
1 teaspoon dried dill--I recommend Pampered Chef's All Purpose Dill Mix
1 tablespoon olive oil
Sea salt
Mix herbs, zest, shallot and dill together, add oil and form a thick paste. Cover a baking pan with foil. Layer orange and lemon slices on pan--about the size of the fish you are using. Figure 6 ounces per person. This recipe was created using a 12 ounce piece of salmon. Put the salmon on the fruit slices. Cover the top of the salmon with the herb mixture. Sprinkle with sea salt.
Bake in a heated 250 degree oven--put a round cake pan half full of water on the rack just lower than you salmon. Bake the salmon at 250 for about 30 minutes. My salmon piece was very thick--I needed the full 30 minutes and then a few. Fish is done when it flakes easily with a fork.
I served this salmon with some delicious Coconut Lime Rice and some steamed spinach. It was perfect!
Printable Recipe
I read several recipes on this method of cooking The Kitchn had some great helps as did Steamy Kitchen. Oh please don't judge this wonderful dish by this poor photo--it is delicious!

Monday, December 30, 2013

New Year's Party Food

Looking for a good dish for your New Years Celebration? Here are a few of our favorites.
Happy New Year from Everyday Insanity!


Tuesday, December 17, 2013

Road Trip Quilt


I spent many years making clothes for my children (ages ago) but find myself a very beginning quilter. Using a rotary cutter and sewing a precise 1/4 inch seam takes practice. The Road Trip Quilt is a perfect place to begin. This scrappy quilt is full of fun prints, bright primary colors and a cuddly minky back. I think 3 year old Gregory will love it!
There is a great tutorial for the  Road Trip Quilt  on the blog,  Cluck, Cluck Sew. Detailed photos tell the story with great instructions. So easy a very beginner can follow along and be successful! I know.
  I'm sure Gregory is really very excited!

I was a bit scared of the binding but my local quilt shoppe was happy to cut strips of striped  fabric on the bias. I love the results! I found a tutorial on  binding a quilt on the Old Red Barn Co. Blog. The step by step photos walked me through the entire binding process. I learned to sew strips on the diagonal making a continuous binding. I also made a beautiful mitered corner (I was quite proud of it). I turned the binding and hand stitched it. One can learn so much on the Internet!
My quilt isn't perfect but it will be loved no less. I am afraid the quilting bug has bit--I have about 3 more quilts in progress and am learning much on a Block of the Month Club, this is a stretch for sure!
Hopefully you will see a few more quilts in the coming months. Quilting--it's a great thing.
So friends, if you have the desire. check out my Pinterest Quilt Board--lots of beginner ideas.


Wednesday, December 11, 2013

A Bloggy Christmas - Day 11


Brought to you by:

A Handful of EverythingLove Bakes Good Cakes  Lady Behind the Curtain  Cooking for the 7 Dwarfs  Everyday Insanity  photo 125X125PartyHatButton_zpsf3d5c052.pngAnyonita Nibbles  Yesterfood Joybee, What's for Dinner? 

On the 12th Day of Bloggy Christmas Miss Nichi gave to me Dipped Oreo Reindeer Cookies!


I'm so excited to be a part of of the 12 Days of Bloggy Christmas.  Thanks to Krista at A Handful of Everything for the invite and all of the wonderful blogs that have contributed.  Today, "on the 12th Day of Christmas, my true love gave to me".....Dipped Oreo Reindeer Cookies.

These little cookies are my newest creation for our Christmas gatherings.  They are almost too cute to eat.  Made with love, they will be a new family tradition year after year. Enjoy!!

Ingredients:
1 package chocolate almond bark (or any other chocolate that you prefer)
Oreo cookies
candy eyes (I used Wilton's candy eyes)
small pretzels
red M&M's

Directions:


Melt bark or chocolate in microwave in 30 second increments until stirred smooth.  
Dip Oreos until covered.  Lay on waxed or parchment paper.


Add pretzels for antlers, candy eyes, and M&M for nose.  Let dry completely.

Source:  Mandatory Mooch original

Don't miss my Tasty Thursdays linky party.  It goes live at 5pm Central time on Wednesdays.

I like linking my posts to THESE GREAT PARTIES!!!! 

Please stop on over to say hi!!

Thanks ~ Nichi

Tuesday, December 10, 2013

A Bloggy Christmas - Day 10


Brought to you by:

A Handful of EverythingLove Bakes Good Cakes  Lady Behind the Curtain  Cooking for the 7 Dwarfs  Everyday Insanity  photo 125X125PartyHatButton_zpsf3d5c052.pngAnyonita Nibbles  Yesterfood Joybee, What's for Dinner? 

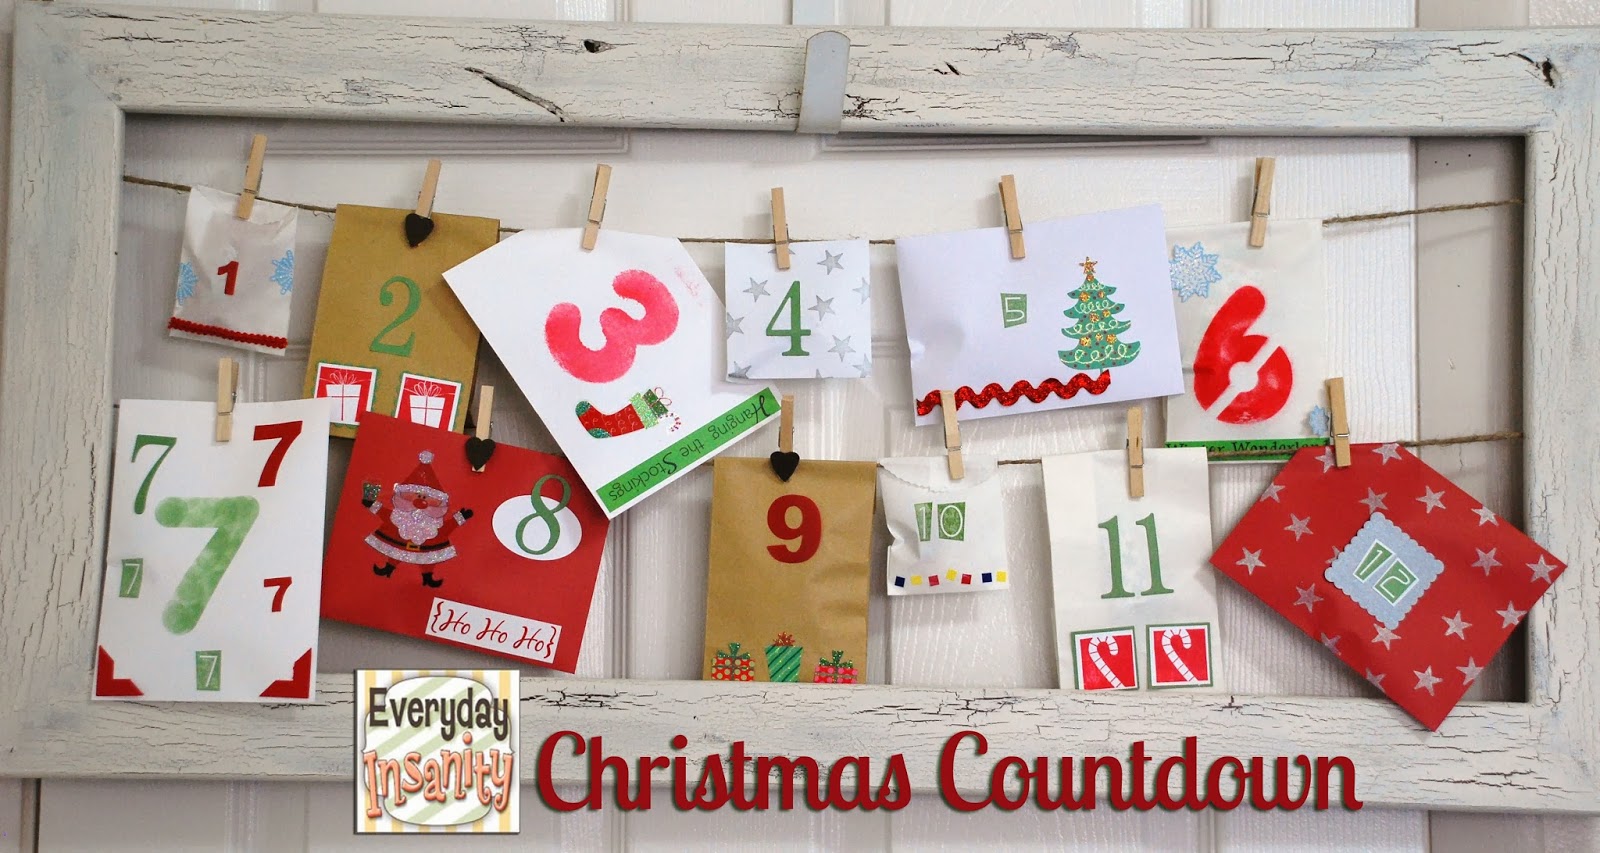
On the 10th Day of Bloggy Christmas Miss Cindy gave to me a Festive and Fun Christmas Countdown


I'm so excited to participate with Krista and these other fabulous bloggers as we share a Very Bloggy Christmas. Enjoy these fun ideas - and Merry Christmas from my home to yours!

I am the lucky aunt to several darling little gals. They are happy, innocent, excited, and just fun to be around. Kids are so enjoyable when you no longer have a house full of your own! We can make a mess, eat treats, create till way past their bedtime--and then they go home. I win the 'favorite aunt' status.

We have had several 'craft days' over the years but last year I hit on a winner. I thought about trying to top it, but after about 10 minutes I quickly decided to just repeat it. It will probably be a yearly activity for many years to come.

What is the great activity? It is very simple advent calendar that even the youngest crafter can create. It starts with envelopes and sacks (that's what I had) and from there the sky is the limit. The envelopes and sacks were decorated with stickers, stamps, ink, punched shapes, markers, stencils and anything else they could find in my craft room.


Decorated envelopes were then filled with small treats. Of course you could also put an activity in the container. Read a Christmas Story, bake cookies, sing carols at a rest home etc., there are so many ways to celebrate the season. But candy is safe, I'll let the Mom's choose their activities!

We used clothes pins to hang the envelopes on a length of cord. The girls opted to make 25 envelopes--a perfect way to count the days until Christmas. We had a great evening--with talk of what we would do next year! This was the perfect way for me to start the Holiday Season.

  Everyday Insanity