Pages

Sunday, March 30, 2014

Mini Lemon Poppy Seed Muffins


I really don't need a reason to make muffins but it is always nice to have someone to share them with. We had a church brunch. I knew there would be children present so I opted for a mini muffin. Dorie has a great lemon poppy seed muffin recipe in her book Baking, From My Home To Yours. I made a few minor changes. I added more lemon flavor and replaced some of the sour cream with non-fat Greek Yogurt. I made minis and I replaced the 'drizzle' with a frosting. I had one yummy muffin. I think you will like it!

Mini Lemon Poppy Seed Muffins
2/3 cup sugar
zest of one large lemon
2 cups flour
2 teaspoons baking powder
1/4 teaspoon baking soda
1/4 teaspoon salt
3/4 cup sour cream
2 large eggs
1 teaspoon vanilla
juice from 1 large lemon
1 stick butter, melted and cooled
2 tablespoons poppy seeds
Frosting
1 cup powdered sugar
2 tablespoons butter or cream cheese, softened
1 teaspoon lemon zest
fresh lemon juice--to desired consistency

In a large bowl rub the sugar and lemon zest together with your fingertips. This will smell wonderful! Whisk in the flour, baking powder, baking soda and salt. In a large bowl whisk together the sour cream (or Greek yogurt), eggs, vanilla, lemon juice and melted butter. Pour the liquid ingredients over the dry ingredients and, with a rubber spatula gently but quickly stir to blend. When mixing muffins a few lumps are better than over mixing. Add poppy seeds.
Scoop muffin in tins that have been sprayed with Pam. This recipe makes 12 regular size muffins or about 42 mini muffins. I use a large Pampered Chef Scoop for the large muffins and a small Pampered Chef Scoop for mini muffins. Bake muffins at 375. Regular muffins take about 18-20 minutes, mini muffins are done in 11-12 minutes.
Cool muffins and drizzle with frosting. To make frosting mix powdered sugar, butter and lemon zest. Add lemon juice till it reaches desired consistency.
Printable Recipe


Friday, March 14, 2014

Key Lime Tarts for Pi Day


Pi Day
How about a mini pie for Pi Day! These little gems are packed full of flavor. Key Limes are fun if you can find them--if not regular lime juice/zest will work. 
My sweet neighbor Kristi is a great cook and surprised me with these yummy little tarts. They are easy to make and taste delicious. Try them! Kristi found the recipe on All Recipes.

Key Lime Tarts for Pi Day
6 mini graham cracker crusts
1 1/2 cup sweetened condensed milk
1/2 cup sour cream
1/2 cup freshly squeezed Key Lime juice
1 tablespoon Key Lime zest
whipped cream for garnish
Put graham cracker crusts on a baking sheet. Heat oven to 350. Mix together sweetened condensed milk, sour cream, lime juice and zest. Pour into crusts. Bake for 8 minutes. Let cool and top with whipped cream.
Printable Recipe

Monday, March 10, 2014

Coffee Cake Muffins


Muffins are always a great way to start ones day. These muffins really do taste like Coffee Cake--only they are easier to serve/share. The recipe comes from America's Test Kitchen Quick Family Cook Book. I trust ATK and they didn't let me down. These muffins come together quickly thanks to my kitchen workhorse-- The Food Processor. I think they will become a family favorite.

Coffee Cake Muffins
1 cup granulated sugar
1 1/2 cups flour
1/2 cup dark brown sugar (3.5 ounces)
1 tablespoon cinnamon
1/2 teaspoon baking powder
1/4 teaspoon baking soda
1/2 teaspoon salt
12 tablespoons chilled butter--cut into 1 inch pieces
3 large eggs
1/2 cup sour cream--I used Greek Yogurt
1/4 cup toasted pecans
Pulse granulated sugar, 1/2 cup flour and 1/4 cup dark brown sugar in food processor until combined--about 5 pulses. Transfer 3/4 cup mixture into a bowl for streusel, leave remaining mixture in processor bowl. Add cinnamon and remaining 1/4 cup dark brown sugar to the bowl of streusel, whisk together and set aside.
Add remaining 1 cup flour, baking powder, baking soda and salt to mixture in bowl of food processor. Pulse until combined, about 5 times. Scatter butter evenly over mixture in food processor. Pulse until mixture breaks down into small pebbly pieces about 10 pulses. Add eggs and sour cream or yogurt; pulse about 8 times until mixture is well combined and thick
Heat oven to 350. Spray muffin tins with Pam. Portion a generous tablespoon of batter in the bottom of each muffin cup. Then top each muffin with 1 1/2 tablespoons of streusel and 1 teaspoon of chopped toasted pecans. Spoon remaining batter evenly into cups. Bake until golden brown and toothpick inserted in center of muffin comes out clean, about 20-25 minutes. Rotate pan halfway through baking.
Let muffins cool slightly before removing from pan. When cool drizzle with Quick Glaze.
 Quick Glaze
1 cup confectioners sugar
1/2 teaspoon vanilla
pinch salt
1-2 tablespoons cream
Mix sugar, vanilla and salt together. Gradually add cream it get the right drizzle!
Muffins a good slightly warm but they we the best after about 2 hours. Gives the streusel time to set up. This was one yummy muffin. Thanks ATK!!
Printable recipe


Friday, March 7, 2014

St. Patrick's Day Craft


My sweet neighbor gal knocked on my door--apron in hand wanting to know if we could bake today. Emma likes making cookies as much as I do. I was ready with a fun food project that is easy and tasty. Kids can do more than just watch--Emma was happy to separate mini M&M's, dip Oreo's, decorate and clean up. This project takes under an hour--it is fun for the entire family.


 Supplies needed:
Oreo Cookies--we chose Mint because we were going with a green theme, you really could dip any cookie or pretzel. How about dipping Thin Mints--yummy.
White, Milk Chocolate or Semi Sweet Melting Discs--purchase at craft stores, Winco or my favorite, Gygi's
Sprinkles--green for St. Patrick's Day
Mini M&M's--we picked out the green ones
Edible Eyes--purchased at Gygi's
Melt chocolate discs in the microwave. Dip Oreo a little over half way. Put on parchment lined sheet. Decorate dipped cookies as desired. We had a great time--you can too. This activity can be adapted to any holiday or season. Sprinkles are inexpensive and come in a variety of designs. Have a package of Oreo Cookies in the storage room and you are ready for a quick activity. Chocolate melting discs are a staple in my kitchen--a chocolate drizzle can make most anything look and taste better!

Wednesday, March 5, 2014

Sugared Almonds--A 'How To' Post


Sugared Nuts
See the progression of the sugared almonds. 1 cup nuts to 1/4 cup sugar. Start on medium heat, stir often--like don't leave the stove. This is not the time to multi-task. Try it and you just might end up with burnt almonds, I know! When the sugar melts the almonds brown quickly--stir continually. They are easy to burn. Pull them off the heat at the desired brownness. Pour on a large dinner plate that has been sprayed with Pam.
Cool and break up if desired. Serve on any salad--especially good on Strawberry Spinach Salad. I buy bulk sliced or slivered almonds at Sprouts or Winco. Costco also had sliced almonds. Sugared pecans also work, same measurements. You could also chop the pecans first. Whole sugared nuts are great snacks.
Printable recipe


Monday, March 3, 2014

My Favorite Granola


I am a granola junkie. I love granola--for breakfast, for snacks for gifts. What's not to love about granola? I have several granola recipes on my blog and they are all delicious. Try any one of them and you will be happy. So why a new recipe?? Because it is the best! It is a pretty ordinary recipe with a few crucial differences. First use whole almonds and just rough chop them. I use my Pampered Chef Food Chopper, a few chops and you have an assortment of almond pieces. This adds a great texture. The next big difference is the way the granola is cooked. Spread it on a large rimmed cookie sheet and press it down with a large metal spatula. Use some pressure. Bake it--and Do Not stir it. When the granola is cool you can break it in chunks. This granola is crisp and light. It is delicious. It is a recipe from America's Test Kitchen. It is my new favorite granola!

My Favorite Granola
5 cups Old Fashioned Oats
2 cups Almonds, chopped coarse
4 teaspoons Vanilla
1/2 teaspoon Salt
1/3 cup Maple Syrup
1/3 cup Brown Sugar
1/2 cup Vegetable Oil
1 cup Dried Fruit--if desired
In a large bowl whisk together salt, sugar, syrup and vanilla. Add oil and mix well. Add oats and chopped almonds, mix until thoroughly coated. Transfer mixture to a large rimmed baking sheet lined with parchment paper. Using a large stiff metal spatula press mixture into pan until compact.
Bake in a 325 degree oven for about 35-40 minutes until light brown, rotating pan once half way through baking.
Cool on a wire rack for at least 1 hour. Break granola into pieces of desired size. Add dried fruit if desired.
Granola can be stored in an airtight container for 2 weeks.
Printable Recipe


Monday, February 24, 2014

Triple Layer Brownie


Triple Layer Brownies
1 cup quick or old fashioned oats
1/2 cup chopped salted dry roasted peanuts
1/2 cup (3.5 ounces)  brown sugar
1/3 cup flour
1/4 teaspoon soda
1/2 cup butter, melted
1 pkg (18-20 oz) fudge brownie mix (plus ingredients to make brownies)
3/4 cup semi-sweet chocolate morsels
1/2 cup creamy peanut butter
Additional chopped peanuts

1. Preheat oven to 350. Spray 9 x13 baking pan with nonstick cooking spray. Combine oats, peanuts, brown sugar, flour and baking soda in a large mixing bowl. Add melted butter: mix well. Press oat mixture into the bottom of pan. Bake for 8 minutes. 
2. Prepare brownie mix according to package instructions. Spoon batter evenly over crust. Bake 24-28 minutes or until toothpick comes out clean. Cool completely.
3. Combine chocolate chips and peanut butter in a small microwave safe bowl. Microwave on high 1 minute; stir until smooth. Spread mixture evenly over cooled brownies. Sprinkle with additional chopped peanuts. Cool until chocolate mixture is set.

This delicious brownie recipe comes from Pampered Chef. It makes a thick, rich bar that is perfect for sharing. I did not use a brownie mix, I just used a favorite 'easy brownie' recipe--I will post it soon. I don't often purchase brownie mixes, but I always have sugar, flour, cocoa, eggs and butter on hand.

Sunday, February 16, 2014

My Favorite Cookie


My Favorite Cookie--now a heading like that will get my attention. I love cookies and have been making cookies for about 50 years. That is a lot of cookies! 
When Mel at My Kitchen Cafe said  this Chewy Oatmeal Chocolate Chip Coconut Cookie was her favorite cookie I had to give it a closer look.It certainly had possibilities--it contained all the ingredients that make a yummy cookie. I made a few changes My Favorite Cookie has nuts, less coconut, a mixture of milk chocolate and semi sweet chips. I made it and declared--it is my new favorite cookie!

My Favorite Cookie
1 cup old fashioned oatmeal
2 1/4 cups flour
1 teaspoon salt
1 teaspoon baking soda
1 cup butter, softened
1 1/4 cups brown sugar (250 grams)
1/2 cup dark brown sugar (100 grams)
2 eggs
1 tablespoon vanilla
3/4 cup coconut
3/4 cup coarsely chopped pecans
3/4 cup semi sweet chocolate chips
3/4 cup milk chocolate chips
Put oatmeal, flour, salt and baking soda in a food processor. Pulse several times until coarse. In a stand mixer beat butter until creamy, add sugars and beat 2 minutes, add eggs and vanilla and beat 2 minutes. Slowly add flour mixture and mix until just blended. Stir in coconut, pecans and chocolate chips. Use a Pampered Chef medium scoop and scoop cookie dough on a parchment lined sheet. Bake at 350 for about 13 minutes until cookie is set and light brown. Cool on cookie sheet for several minutes and then on a cooling rack. Makes 3-4 dozen cookies. Serve with a tall glass of cold milk. Share...or you will overeat!
Next time I make this cookie I just might add white chocolate chips to the mix.
Printable recipe

Tuesday, February 11, 2014

Bean and Beef Buritos


Bean Burritos at the Harris house usually come from our very local Drive Inn called Taco Amigo. My kids love Taco Amigo. Two of my boys spent  2 years in Brazil serving a mission for our Church eating mainly rice and beans. On the way home from the airport we had to make a stop at Taco Amigo!  Taco Amigo is different from the beans we have been eating the boys would state when asked if they really wanted to get beans? So Taco Amigo it is. The Grand-kids love it, I endure it. I like crunchy tacos and fries, and Nachos and Diet Coke.
So why am I making a Bean and Beef Burrito? Because Cooks Country says they are amazing and I trust them. They were amazing, a little labor intensive but the meat and bean mix freezes well. I made some yummy quesadilla with the left overs. Yes this is certainly worth making.

Bean and Beef Burritos
1 recipe Savory Rice--this rice really makes these burritos, it takes about 20 minutes--start it first
1/2 cup low sodium chicken broth
1 15 ounce can pinto beans, rinsed and drained
1 tablespoon vegetable oil
1 onion chopped fine
3 tablespoons tomato paste
3 garlic cloves, pressed or minced
1/2 tablespoon ground cumin
1 teaspoon dried oregano
1 teaspoon chili powder
12 ounces, 90 percent lean, ground beef
1 tablespoon lime juice
3/4 teaspoon salt
6 (10 inch) flour tortillas
About 2 1/2 cups shredded cheeese,divided. I used half sharp cheddar and half jack
6 tablespoons sour cream
Combine broth and half of the drained beans in a medium bowl. Using a fork or potato masher, coarsely mash beans together with broth. Heat oil in a 12 inch nonstick skillet over medium heat until shimmering. Add onion and cook until just beginning to brown, about 5 minutes. Stir in tomato paste, garlic, cumin, oregano,and chili powder. Cook until fragrant about 1 minute. Add beef breaking up pieces with a spoon. Cook until no longer pink, about 8 to 10 minutes.
Stir mashed bean mixture into meat mixture. Cook stirring constantly until nearly all liquid has evaporated, about 3 minutes. Stir in remaining whole beans, lime juice and salt. Remove from heat, cover and set aside.
Adjust oven rack 3 inches from broiler element and heat broiler. Line rimmed sheet with foil. Wrap tortillas in a clean dish towel and microwave until soft and pliable about 90 seconds. Arrange tortillas on counter. Divide Savory Rice, beef and bean filling, and half of the cheeses evenly among tortillas. Put sour cream in a zip lock baggie, cut a small corner off and use the bag as a piping bag. This makes it so much easier to evenly squirt 1 tablespoon sour cream on each burrito. Either roll or fold burrito--whatever works best for you! Transfer burrito to foil lined baking pan. Sprinkle remaining cheese evenly over burrito. Broil until cheese is melted and starting to brown--rotate sheet half way through. Serve,
The Bean and Beef mixture freezes beautifully. Put it in a freezer bag, date it and use it within 6 weeks. I used the filling, rice, sour cream and cheese and made a delicious quesadilla.
Printable Recipe


Sunday, February 9, 2014

Savory Rice


Well friends--I have finally found a rice dish that can stand on its own! This yummy  Savory Rice comes from a Cook's Country magazine. It is perfect.

Savory Rice
3/4 cup rice
1 1/2 cups chicken broth
3 garlic cloves--pressed
1/2 teaspoon salt
1/2 cup chopped cilantro
1 lime, juiced
Put rice, chicken broth, garlic and salt in a small saucepan. Heat to boiling, stir. Cover, lower heat to a simmer cook covered 20 minutes. Remove from heat and let sit covered for 10 minutes. Stir in cilantro and lime. This rice is good on its own or serve it as a side with most anything! Enjoy.
Printable Recipe

Wednesday, February 5, 2014

Chicken and Mushroom Deliciousness...


Hello there!

Jill here, hacking into my cute mama's blog to share a little something with you. Before I get started, if you have a New Year's resolution to eat healthier, or cut back on calories, then this recipe is NOT for you...but, if one of your New Year's resolutions is to indulge more and eat delicious food, then get yourself super excited!!

This recipe is a Pinterest find from Plain Chicken for Chicken Lazone. While the recipe seemed very promising and looked tasty, I felt like it could use a little somethin' extra. So, I started playing around and this is what I came up with.


Chicken and Mushroom Deliciousness
1 lb. chicken breast - Cut into bite size chunks
1/2 tsp. salt
1 1/2 tsp. chili powder
2 tsp. garlic powder
1/4 tsp. cayenne pepper

1/2 onion diced
8 oz. mushrooms - sliced or quartered
3 Tbs. butter, divided
1 cup heavy cream
1/2 cup freshly grated Parmesan - plus more for garnish, if you're into that sort of thing.

Combine salt, chili powder, garlic powder, and cayenne pepper.  Toss in a bowl with the chicken chunks until evenly coated. In large saute pan, melt 2 tablespoons of butter over medium-high heat (you want the heat a bit high so get your chicken nice and browned).  Cook the chicken until done, about 6-8 minutes. Remove from pan and set aside.

In the same pan, lower the heat to medium and add the rest of the butter. Throw in the diced onion and mushrooms and sauté for a few minutes.  Make sure you don't clean out the pan before adding the onion and mushroom...you want to get all that leftover browned goodness at the bottom to add flavor to the veggies.

Once your onion and mushrooms are done, add the chicken back into the pan along with your cream and Parmesan cheese.  Lower heat and simmer until the sauce thickens, about 5-7 minutes.

Serve this chicken and mushroom deliciousness over angel hair pasta or a baked potato along with a simple green salad and some french bread.

Enjoy!

P.S. For some variation, you could add some diced red pepper with the mushrooms and onions. I think next time I will chop up some asparagus and add it in there too.

P.P.S. the leftovers are great the next day...or at 10:30 at night when you need a little snack.
Printable Recipe

Sunday, February 2, 2014

Sweet Lemon Ribs


Sweet Lemon Ribs have been a family favorite for years! I think the first time I tasted them was at a Cub Scout Blue and Gold Banquet. My good friend Judi was in charge of the meal--I knew it was going to be good and we were not disappointed!
We purchased boneless Country Style Ribs from a little Market in Down Town Pleasant Grove.
Smith's Market is long gone, I do miss a small market--you don't spend a lot of money because there are only a few choices. The prices were right so I shopped there often--they had a great meat counter that cut to order. A few fruits and veggies, milk, eggs etc. It really was the market of my dreams. Too many choices can be wonderful or give me a headache!
What does this have to do with Sweet Lemon Ribs--nothing other that I bought them there--very lean and meaty. Actually they can be found at most meat market, sold as Boneless Country Style Ribs. Let's begin:
Sweet Lemon Ribs
3 pounds Country Style Boneless Ribs
1 small can lemonade
2  small lemonade cans, water
3 tablespoons soy sauce
3 tablespoons ketchup
3 tablespoons brown sugar
1/2 teaspoon salt
2 teaspoons vinegar
Place ribs in a large pan of water--bring to a boil and simmer for 1 hour. Drain out water,  remove ribs and wipe down pan. Put ribs back in pan. Mix sauce together. Stir together lemonade, water, soy sauce, ketchup, brown sugar, salt and vinegar. Stir well. Pour over partially cooked meat.
Baked covered at 325 for 2-3 hours or until fork tender, check at the two hour mark--you want them cooked but not dried out..When meat is tender put in a serving bowl. Mix some cornstarch in water to a smooth thick paste Slowly.pour into pan sauce and stir. Cook and stir until desired thickness. Pour sauce over cooked ribs. Top with sliced green onions. Serve with rice or mashed potatoes.
Printable Recipe

Thursday, January 23, 2014

Dulce de Leche Brownies made by Amber


 Beautiful Photography by the talented Amber Linderman Photography
I have mentioned before that my gals are great cooks--we live miles apart but we are always sharing menus, food ideas and new recipes. This recipe comes to us from David Lebovitz-a foodie that resides in London.
Amber made it, was amazed and promptly sent pictures out to each of us--to share the recipe and to make us slightly jealous that we weren't eating this yummy confection! I think it worked--we will all be making this before the weekend is up. One slight change--Amber opted to spread the nuts on the top of the finished brownie. That way she can please even those who aren't fond of nuts. Brilliant idea Amber.
On to the recipe:

Dulce de Leche Brownies--from Amber
8 tablespoons butter, diced
6 ounces bittersweet or semi-sweet chocolate, chopped
1/4 cup Dutch Process Cocoa Powder, Unsweetened
3 large eggs
1 teaspoon vanilla
1 cup sugar
1 cup flour
1 cup toasted pecans or walnuts
1 cup Dulce de Leche

Line an 8-inch  square pan with a foil sling, spray with Pam. this will insure the brownies will not stick and will help in the removal of the brownies.
Melt the butter in a medium saucepan. Add the chocolate pieces and stir constantly over very low heat until the chocolate is melted. I have been know to do this step in the microwave. My microwave has a setting just for chocolate melting. I love it, I use it! Remove from heat/microwave and whisk in the cocoa powder until smooth. Add in the eggs one at a time, then stir in the sugar, vanilla and flour. Mix in the nuts or reserve for sprinkling on top. Now have fun!
Scrape half of the batter into the prepared pan. Drop one-third of the Dulce de Leche, evenly spaced, over the brownie batter, then drag a knife through to swirl it slightly. Spread the remaining brownie batter over, then drop spoonfuls of the remaining Dulce de Leche in dollops over the top of the brownie batter. Use a knife to swirl the Dulce de Leche slightly. Sprinkle nuts on top if desired.
Bake at 350 for 35-45 minutes. Brownies will be done when center feels just slightly firm. Cool completely. Remove from pan, remove foil. Cut into smallish squares--they are rich. Enjoy!
Printable Recipe


You might also like:
Packable Brownies
Ghirardelli Classic Brown Sugar Brownie
Peanut Butter Cup Blondie
White Chocolate Browned Butter Blondie
Secret Recipe Club Brownie--Danielle's Brownie

Monday, January 13, 2014

Oreo Cheesecake Bites ala Jess


My sweet Daughter-in-Law Jess came to visit the other day. She brought dessert, she brought amazing dessert. We ate it and enjoyed every bite. Good job Jess. Dessert is always welcome at our home! This rich dessert feeds a crowd, it also keep well in the refrigerator for several days. Tightly wrapped it will keep for a month in the freezer. Wouldn't it be great to have a few goodies in the freezer for unexpected company--great idea!

Oreo Cheesecake a la Jess
36 Oreo Cookies
4 tablespoons butter
4 8 ounce packages of cream cheese--softened
1 cup sugar
1 cup sour cream
1 teaspoon vanilla
4 eggs
4 ounces semi-sweet melts--purchased at Winco or Gygis
4 ounces vanilla melts--purchased at Winco or Gygis
Line a 9x13 inch pan with foil--leave a 2 inch overhang--this will help in removing the bars. Spray the foil with Pam.
Finely crush 24 of the Oreos, add melted butter and combine. Press Oreo crumbs onto the bottom of the 9x13 pan, put in the freezer while mixing filling.
Beat the soften cream cheese till smooth. add sugar and mix well. Gently add sour cream and vanilla. Add eggs one at a time--beat gently after each addition. Coarsely chop the remaining cookies and fold them into the batter. Remove crust from the freezer--pour filling over crust. Bake at 325 for 35-40 minutes. Cheesecake is done when the sides are set and the center is almost set. Cool completely on a rack, When cool cover with plastic wrap and put in the refrigerator for 2 hours. When cold remove cheesecake from the pan using the foil over hangs--aren't you glad you left them! Remove foil and cut in bite size bars, these are quite rich so keep squares small. Put cheesecake bites on parchment paper. Put semi sweet chocolate melts in a heavy baggie. Melt in the microwave at 30 second intervals, knead the chocolate until it is melted and smooth. Cut a small hole in the corner of the bag and drizzle the chocolate onto the bars--have fun. It is good to drizzle! Repeat with the white chocolate. The chocolate will harden quite quickly but as with any good cheesecake the flavors will marry and be much better tomorrow. Tightly wrapped these bites will keep several days in the fridge. Wrapped tightly they will keep a month in the freezer. Thanks Jess
Printable Recipe
Inspired by Kraft

Tuesday, January 7, 2014

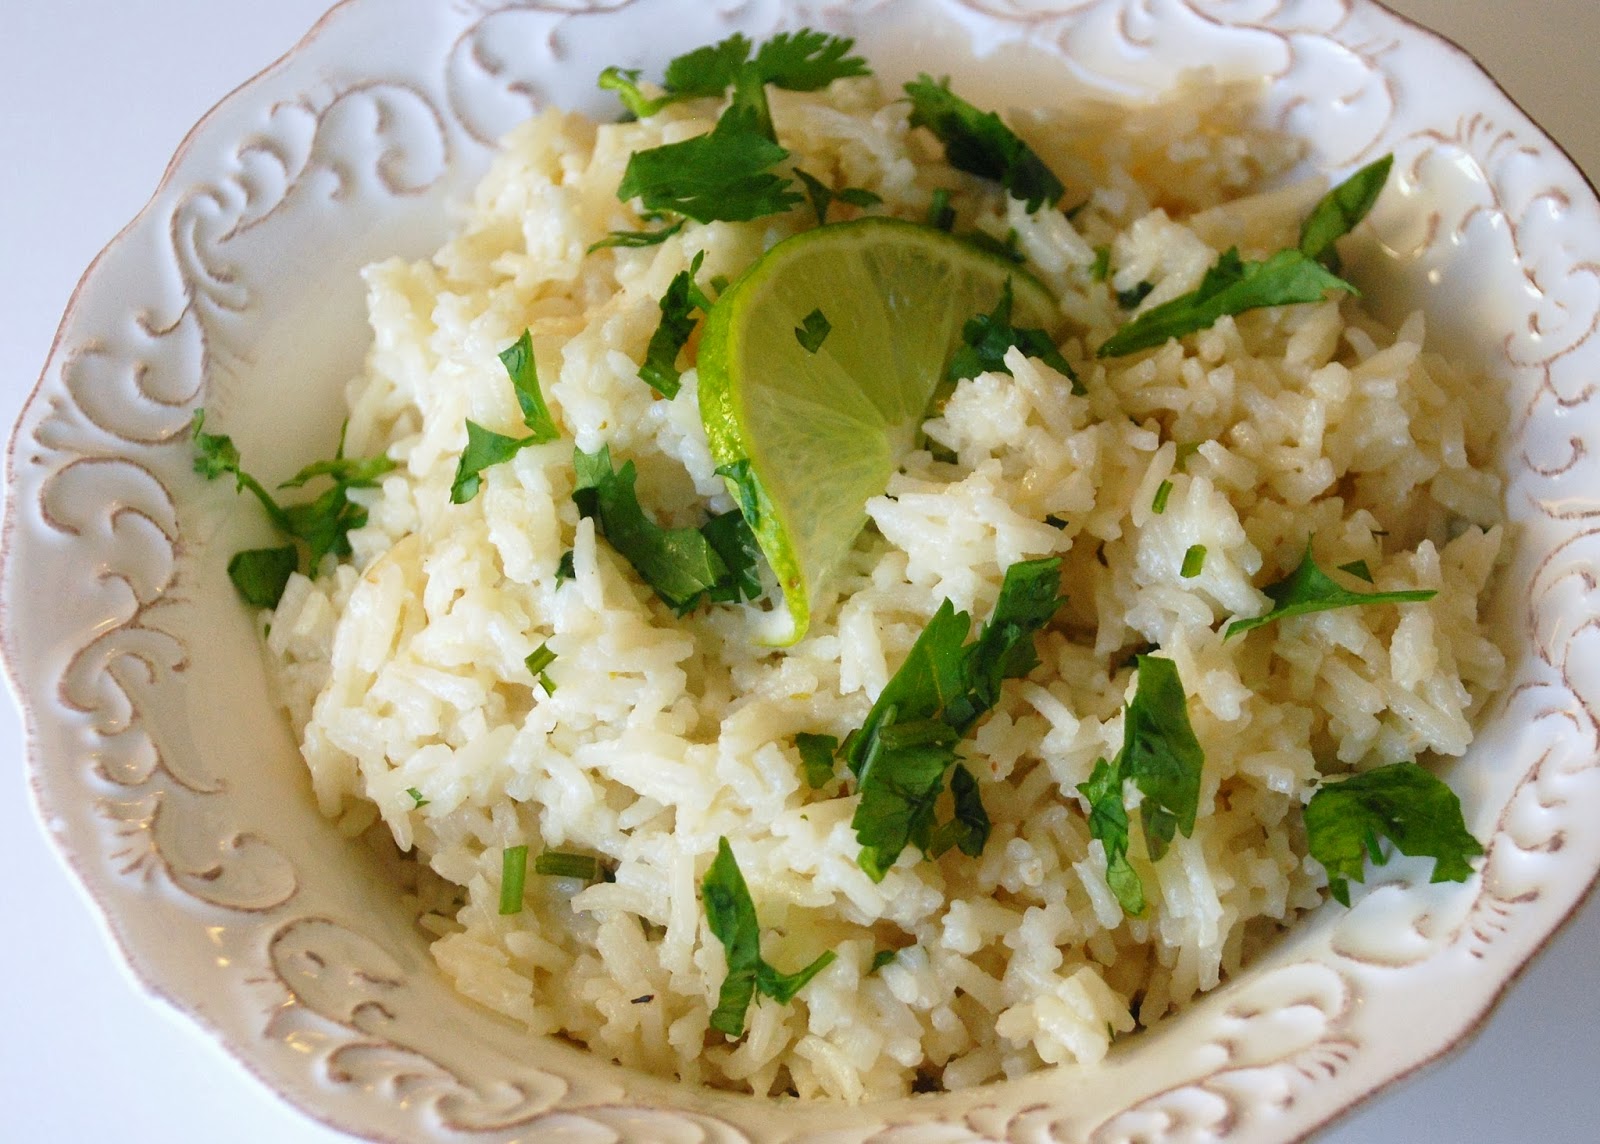
Coconut Lime Rice with Cilantro


This delicious rice stands on its own; adding coconut milk gives it a rich creamy flavor. I served it with a salmon dish but I'm sure it will taste great with Thai or even Mexican. Flavorful rice with a pop of lime, sides don't get much better!

Coconut Lime Rice
1 tablespoon olive oil
2 cloves garlic, pressed
1 cup Basmati rice
1 cup chicken broth
1 cup coconut milk
Sea Salt--to taste
1/2 cup cilantro
Juice from 1-2 limes
Heat oil in a saucepan add garlic and cook 1 minute--stir constantly.
Add rice and cook 4 minutes--stir often.
Add chicken broth, coconut milk and sea salt, bring to a boil, stir.
Reduce heat to simmer, cover and cook 20 minutes.
Remove pan from heat, let sit covered for 5 minutes.
Fluff rice, add cilantro and lime juice.
Enjoy!
Printable Recipe
There are many versions of this recipe. I based my recipe on one from The Love of Cooking, but I had to add lime juice because everything tastes better with a splash of lime!