Pages

Thursday, September 27, 2012

Cinnamon white chocolate, Cranberry Bars


This is just a basic 7 Layer Bar--on steroids! It's amazing what happens when one adds cinnamon chips, white chocolate chips and dried cranberries to a simple recipe. Every bite contains a surprise. This is one delicious bar!

I made this bar twice--the first time I used the instructions on a popular blog. My results were less than stellar. The recipe had you drizzle the sweetened condensed milk on top of the crust. then add the toppings and baked it. The recipe was good but not great. The crust was soggy. I knew this recipe could work. It is a popular recipe with many great variations.
So I went to my Americas Test Kitchen, The Best American Classics Cookbook. A variation of this recipe is pulled apart and made wonderful. I used the technique in the ATK cookbook applied it to this recipe and it turned out just the way I wanted it. I love ATK cookbooks. I always wonder why things do or do not work in cooking/baking. My questions are always answered. I own several ATK cookbook and consider each one a treasure. If you read cookbooks like novels--as I do these are the cookbooks for you!
So here is the ATK version with some seasonal twists. I have my good friend Carol to thank for this recipe. She brought me a plate of these and the search began!

Cinnamon, White Chocolate Cranberry Layer Bars
1 cup sweetened coconut
8 tablespoons butter
8 whole graham crackers, 4 ounces, crushed (Place the crackers in a large zipper lock bag and pound them with a smooth mallet. The result should be an assortment of crumbs, bits and chunks that measure about 1 1/2 cup.)
1/2 cup chopped pecans or walnuts
1 cup white chocolate chips
1 cup cinnamon chips
1/2 cup dried cranberries
1 (14 ounce) can sweetened condensed milk
Heat oven to 350 degrees. Spray a 9x13 inch pan. Cover with foil, spray again. Spread the coconut on a baking sheet and bake until the outer flakes just begin to brown, about 8 minutes (don't multitask on this one, coconut burns easily! I know.) At the same time place the stick of butter in the 9x13 inch pan. Put it in the oven for about 6 minutes and let the butter melt (I guess this is multitasking, just be careful)!
When the butter is melted remove the pan from the oven and sprinkle the graham cracker crumbs over the melted butter. Toss lightly until all the butter is absorbed and the crumbs are evenly distributed. In order sprinkle the nuts, white chocolate chips, cinnamon chips, coconut and dried cranberries over the crust. Pour the entire contents of the sweetened condensed milk evenly over the dish. Return to the oven and bake until top is golden brown, about 25-30 minutes. Cool on a wire rack at least 2 hours. Remove from pan, remove foil and cut into bars.

1 year ago--5 Minute Fudge
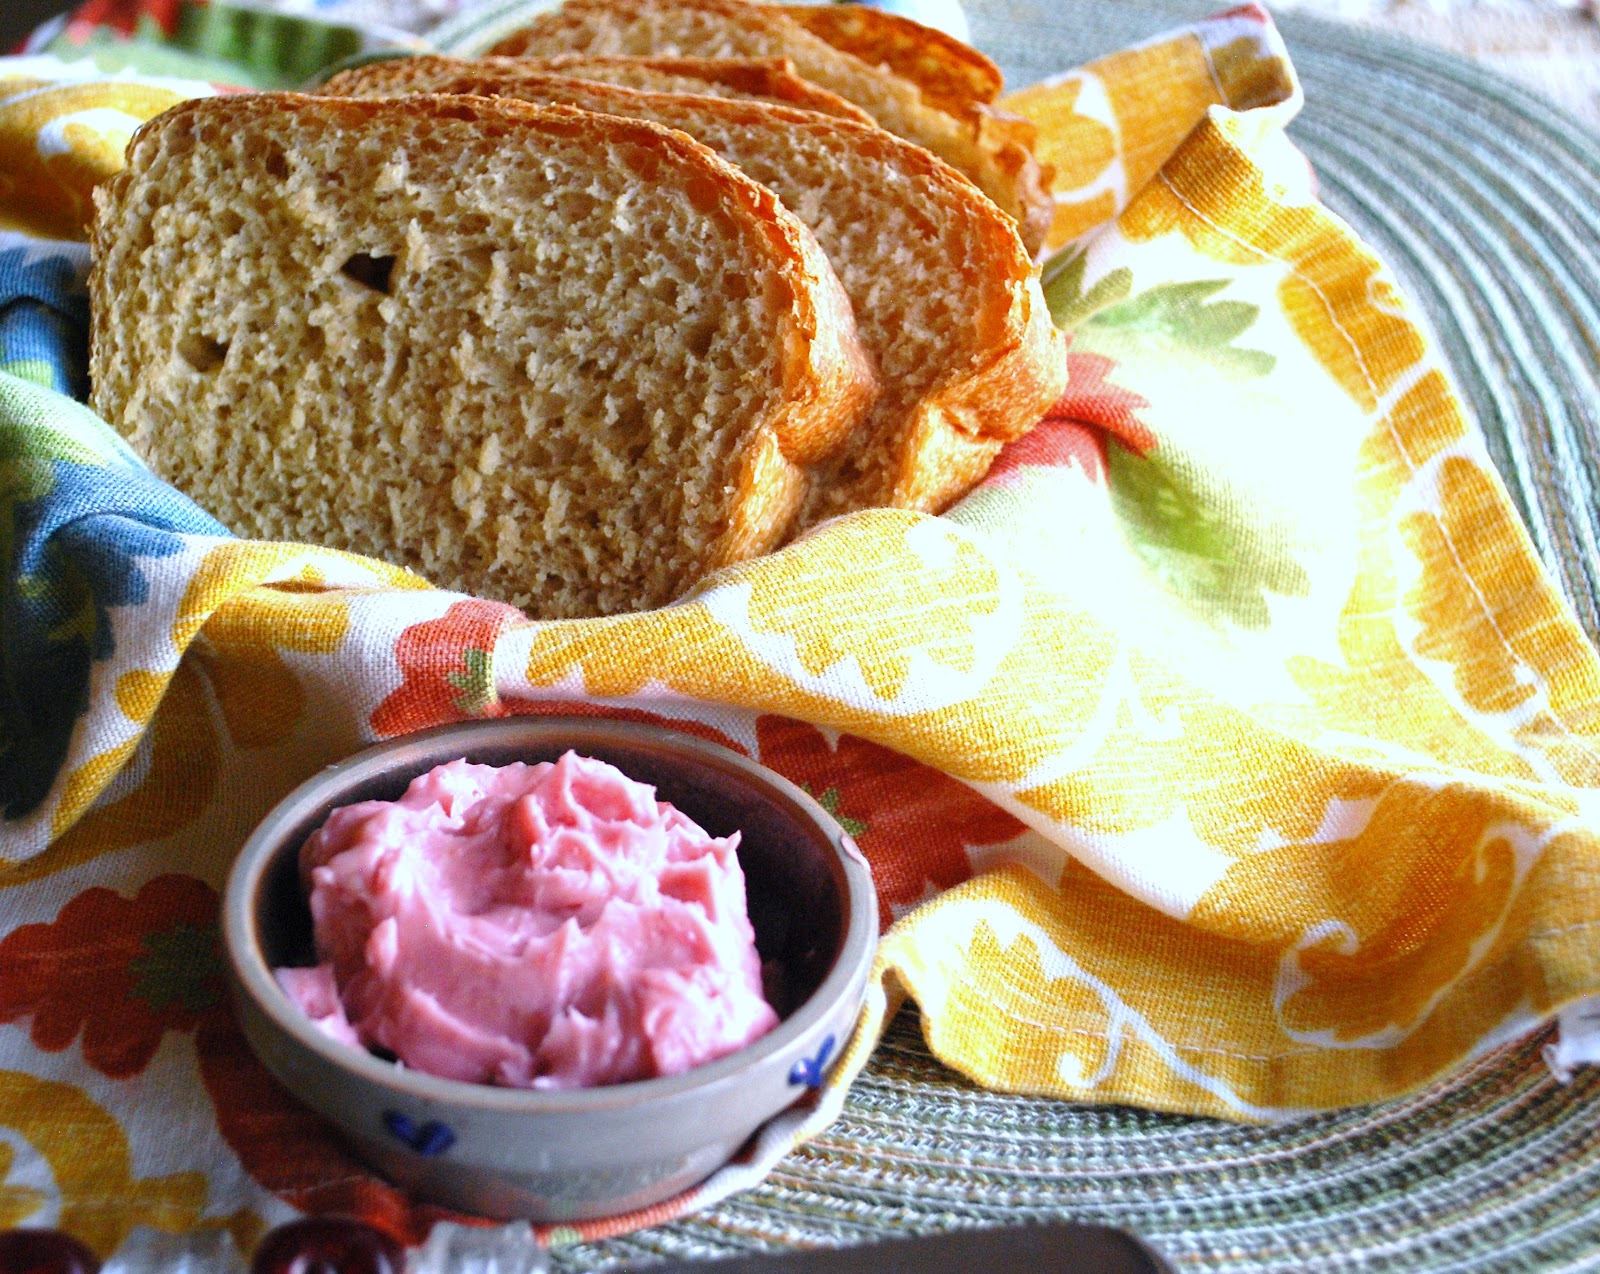
2 years ago--Rosemary Bread
3 years ago--Banana Pecan Cupcakes

Tuesday, September 25, 2012

Garden Tomato Soup


 When I need new recipes I often just ask one of my daughters. They are always cooking something good. Candise loves to garden and has had a large garden plot since she has lived in Idaho. Not just a few plants but a garden that provides enough produce that she cans plenty. I enjoyed many years of canning. Canning
food, especially if you have grown it is a very satisfying activity. Jars of fruits and veggies lined up on the shelves of a storage room is a beautiful thing. Here is a shout out to all those who can!

This recipe is made with garden fresh produce. Can you can it? I really don't know but consult your Ball Blue Book or your County Extension Agent. They know everything there is to know about canning food in your locale.
I have a great recipe for Quick Tomato Soup--made with canned tomatoes. It is delicious, I make it often. But when your garden is full of tomatoes, onion and basil this soup can't be beat. Try it. 


 Garden Tomato Soup
 2 Tbsp olive oil
1 large onion- diced
A handful of fresh basil
8 cups tomatoes, peeled and quartered
2-3 T. tomato paste
3 cups chicken broth
1 t. sugar
Salt and pepper to taste
3/4 to 1 cup cream

Saute the onion in the olive oil until brown, then add basil and saute.  Add tomatoes, broth, tomato paste, and sugar.

Let soup simmer for about 15 minutes, then blend to desired consistency with immersion blender.  Taste and add salt, pepper, or more tomato paste if necessary.  When simmered to desired consistency, add cream.

You can also blend the tomatoes prior to adding to onions and basil – but I like the thickness of blending them with the broth/onions/etc.
This recipe is what tomato soup should be, fresh, flavorful and a little creamy. Perfect.
This recipe made plenty, I served it with grilled cheese sandwiches for a delicious fall meal. It would probably freeze but I would not add the cream until I served it. Cream doesn't always freeze well.

This recipe is a reason to own an Immersion Blender. It makes quick work of what could be a messy job. 

Sunday, September 23, 2012

Barbequed Turkey Tenders


This is a simple recipe that we have been making for years. It is often requested for birthday dinners. Our local neighborhood grocery store always carries boneless turkey tenders, turkey steaks would also work. This simple marinade transforms turkey into a delicious meat that can now be served more often than just Thanksgiving. This is also yummy as a marinade for chicken kabobs.

Barbequed Turkey Tenders
1/2 cup oil
1 cup 7 Up--not sugar free
1/2 cup soy sauce
1 teaspoon horseradish
2 teaspoons italian seasoning
Turkey Tenders or steaks
Mix ingredients together. Add turkey tenders, let marinate for up to 24 hours. Grill tenders until internal temperate reaches 160 degrees.


Tuesday, September 18, 2012

Whole Wheat Loaves TWD/BWJ


Making bread has been a big part of my life.  With 6 children at home making homemade bread was a necessity. We went through plenty of peanut butter sandwiches. Making bread was a big savings. I had a Bosch Bread Mixer and a wheat grinder that sounded like it had an airplane engine! I made 6-8 loaves of bread every week. Over the years my bread making has all but subsided--how much bread can two people eat? I do however believe in the skill of bread making. My daughters are great bread makers. If you master the art of bread making you can be the hit of any gathering. A pan of hot rolls is always welcome! A loaf of homemade bread and a jar of jam makes a wonderful hostess gift.


So what happened to my bread today?? Well, as I said making bread is a skill--if not practiced one becomes rusty. I started out great. Fresh yeast, freshly ground flour. I was off to a great start, the dough felt perfect and it raised as it should. My problem was in my pans. Yes, pans. I didn't have the sized specified in the recipe so I used pans that were too big. I let the dough raise to much and when it hit the heat the loaves deflated. The bread was too coarse. This was my fault, not the recipe! I asked Hubby's advice on how to photograph my less than perfect loaves. Cut thick slices was his remark. So I did. This bread didn't taste bad. I will give it another try. These loaves will become salad croutons.
Hopefully my fellow TWD bakers had better luck. Check Michele and Teresa's blogs for the complete recipe. And learn to make bread--it's a good thing to do.

Monday, September 17, 2012

Fresh Tomato Basil Pasta


There is nothing like getting a new cookbook to rekindle your cooking excitement. Thanks to Amazon Prime I can have a new cookbook soon. I do love instant gratification, I don't wait really well. So I guess the cookbook I purchased was just right for me it is Giuliano Hazan's Thirty Minute Pasta--100 quick and easy recipes.
My good friend Kayte has been singing praises for this cook book for ages now. She and a few friend make a new recipe each week and post on the same day. It is pretty casual but it is always fun to see what they post. So I purchased the cookbook and there really are recipe after recipe of very simple pasta meals.
My first recipe had to be one that utilized my garden fresh tomatoes and fresh basil. These two items won't last much longer. The recipe was easy and delicious. Kayte said she cooks extra pasta and keeps it in the fridge. Getting dinner on the table becomes that much quicker.
I will give the recipe as I made it--just a few variations that didn't change the outcome.

Angel Hair Pasta with Fresh Tomato, Olive Oil and Basil
2 pounds fresh ripe tomatoes
4 garlic cloves
3 tablespoons extra-virgin olive oil
1/8 teaspoon red pepper flakes (scant)
10 fresh basil leaves
8 ounces cooked pasta
Drop the tomatoes in boiling water, leave for 60 seconds. Remove and run under cold water, skins will slip right off. Dice tomatoes in 1/2 inch dice
Peel and thinly slice the garlic. Put the garlic, 2 1/2 tablespoons of olive oil and red pepper flakes in a 12 inch skillet. Place over high heat. The moment the garlic begins to sizzle add the tomatoes and season generously with salt. Cook for 15 minutes, stirring occasionally until most of the liquid has evaporated. Coarsely shred the basil and add to the sauce. Continue cooking until all the liquid is evaporated.
Add the sauce to pasta that has been cooked in salted water until al dente. If you are using pasta that has been cooked earlier in the day or week either submerge in hot water for a moment or microwave till hot. Serve sauce with pasta. Drizzle individual serving with olive oil, we also added pepper. We added a sprinkle of fresh grated parmigiano reggiano cheese. It was delicious. I served it with crisp bakery toast. It was a very filling meal.
This amount of sauce made 4 adult servings. But the recipe called for 16 ounces of pasta for 4 servings. 8 ounces was plenty of pasta for us.
Will I make it again--yes! You just can't go wrong with fresh tomatoes and basil.

Friday, September 14, 2012

Autumn Granola


I have 6 granola recipes on my blog, do I really need one more? Yes I do. This beautiful granola gets it's fall colors from some delicious dried fruit that I purchase from King Arthur Flour. It is their Fruitcake Blend but  don't let the word fruitcake scare you. This is my favorite blend of dried fruit because the pieces are small but the flavor isn't. It contains dried pineapple, golden raisins, apricots, cranberries and dates. Beautiful little bites of fall. I made two batches, one for me and one to share. Who doesn't like a bag of homemade granola.

Autumn Granola---inspired by Cooking For Seven

4 cups oatmeal
1 cup coconut
1 1/2 cup nuts (I used walnuts but use what you love)
1/4 teaspoon salt
4 ounces butter (melted)
1/4 cup pure maple syrup
1/4 cup honey
1 tablespoon pure vanilla
1 cup dried fruit
Mix oatmeal, coconut, nuts and salt in a large bowl. Melt butter, add syrup, honey and vanilla. Pour over oat mixture and stir well. Spread on a sheet pan. Bake at 300 degrees for 30-40 minutes. Stir often. When granola is cool add dried fruit.


Tuesday, September 11, 2012

Peanut Butter Granola


I had been baking one day and my sweet niece stopped in to sample my creations. The Peanut Butter Bars are always a hit. I made a batch of brownies that although not bad didn't make the blog cut. We came to the Peanut Butter Granola--I had Lacy sample it (now Lacy is expecting so factor that in). She like it, she really liked it. I suggested that I would probably serve it with fresh fruit and Greek Yogurt. She smiled and said, I think it would be good on ice cream! Lacy was right on. It was delicious on Vanilla Bean Ice Cream with a drizzle of chocolate! Yes, I also enjoyed it for breakfast with yogurt and fruit. However you serve it, it's delicious. Inspired by a recipe on Liv Life.

Peanut Butter Granola
4 cups oats
6 tablespoons ground flax meal
1/2 teaspoon salt
1 cup creamy peanut butter
1/2 cup brown sugar
drizzle of honey
2 teaspoons vanilla
2 egg whites, lightly beaten
Mix oats, flax meal and salt. Set aside. On low heat warm peanut butter, brown sugar and honey. Add vanilla. Mix with oatmeal stir well. Stir in egg whites. Spread granola on sheet pan. Bake at 325 for 20-30 minutes stir once. I like my granola crispy so I baked it a little longer.

Monday, September 10, 2012

Chocolate Peanut Butter Cookies and The Night Time Baker!


Coming home from school was my favorite part of the day. Mom was always home, as soon as I opened the door I knew just what she had been doing. More often than not wonderful smells hit me. Chocolate cake, cookies, fresh bread, cinnamon rolls and maybe in winter a pot of beef stew. School cares were left at the door as we ate a home baked treat and chatted about our day.
I do think the power of smells is magical.


We had been married about 13 years, we had 6 small children and hubby was the mayor of our very small but rapidly growing town. He had meetings every week--oft times the meetings would get heated, tempers flared. My mild mannered hubby put up with this surprisingly well. I wanted home to be a place of love and happiness--and good smells! Hubby's meetings often went till late at night. I think that is when I became the "night time baker". I remembered my childhood and how troubles seemed to melt away at the smell of good food. So I put it to the test. Luckily my kids had early bedtimes. Once they were asleep the kitchen came to life. I would make brownies one night, cookies another and occasionally sweet rolls with caramel frosting.
Hubby opened the door from his harried meetings and a waft of delicious smells greeted him. I'm not saying all his problems disappeared but a waft of deliciousness met him at the door.


This tradition continued through another 5 years as he served as the Bishop of our church congregation. Starting a batch of brownies at 10 PM is normal at my house. Then breakfast is taken care of too!
Why this ramble down memory lane? Hubby spent a week in Alaska, he didn't get home till 10 PM. I started these yummy Peanut Butter Chocolate cookies at 9. He opened the door to hugs, kisses and a waft of sweetness. That is a good thing! And these are one delicious cookie. Very soft--don't be tempted to over bake. The drizzle of chocolate is the perfect finish. These would be yummy any time of the day or night!

Chocolate Peanut Butter Cookies
1 1/3 cup flour
1 teaspoon baking soda
1/4 teaspoon salt
1 cube butter (4 ounces)
2/3 cup smooth peanut butter
1/2 cup granulated sugar
1/2 cup brown sugar (3 1/2 ounces)
1 egg
2 teaspoons vanilla

In a small bowl whisk together the flour. baking soda and salt.
In your mixer put softened butter, peanut butter and sugars. Mix about 3 minutes. Add the egg and vanilla and mix well. Gently stir in the flour mixture. Please don't over mix. Bake at 350 degrees on parchment lined stoneware. Did you know you can get huge rolls of parchment paper at Costco. It's by the plastic wrap and foil. I do love my big roll of parchment paper!
I use my small Pampered Chef Scoop for these little gems. I did flatten them slightly before cooking. Bake for 9-11 minutes. My cookies needed the 11 minutes. Cool cookies for a few minutes on the sheet pan--they have to set up. When they can be safely moved to a cooling rack you are ready to pop them in the freezer for a few minutes. I'm usually in a hurry and the freezer is my friend! This batch makes about 3 dozen smallish cookies.

For the drizzle put 1/3 cup milk chocolate chips and 1/3 cup semi sweet chocolate chips in a heavy duty zip lock baggie. Add a heaping teaspoon of Crisco. Seal the bag and melt in microwave. My micro wave has a setting for melting chocolate--I love it. Without a setting just melt it at 50% power and stir every 30 seconds. When chocolate is warm, melted and very squishy--mix it together good. Cut a very, very small hole in the corner of the baggie. Pretend like you are on Cup Cake Wars and drizzle the now cold cookies. Have fun--you get to play in your food! Let the chocolate harden and serve. Or just enjoy before they are cool--they may be messy!
This recipe was inspired by Cooking Classy a blog I found while looking at quilting blogs. I have no idea how I found it!


Tuesday, September 4, 2012

Witchy Pillow!


I've always enjoyed doing needlework. Sometimes more than others. My sweet friend introduced me to this cute pillow. I went right to the fabric store and bought a couple of kits. My daughter spent a few days with me so we started these cuties.


As with most cute projects I want to share them with my daughters and daughters in law. Before I know it I'm thinking I need to make 6 or 7 pillows. I' ve got two done--several more to make. But aren't they darling.
Better get busy!

Nectarine Upside-down Chiffon Cake--TWD BWJ


We celebrated Hubby's birthday late--a month late to be exact. That's what happens when a birthday falls just days before a child's wedding. Normally I would just make a chocolate bundt cake or something tried and true. Thanks to this wonderful baking group I had the challenge to make something new and different.
I read the recipe thru several times--it does need a little thought and planning.


But can I just say for the record that this Nectarine Upside-down Chiffon Cake was absolutely delicious. It was like nothing I've ever tasted (maybe I should get out more)! The nectarines and brown sugar made a beautiful topping. The Chiffon Cake part  was light and delicious. The streusel was good but if I made the recipe again I would leave it out so I could just enjoy the cake. The baked streusel was tasty and I see many uses for it. Like atop blueberry muffins or on top of fresh peach ice cream. I really don't lack in the dessert department!

All in all I'm glad I made this recipe, glad I tried something slightly out of my comfort zone. Very happy to have a well written cookbook that walks me right thru a dessert such as this. We were all happy to have a delicious late birthday cake!
The complete recipe can be found on Marlise's and Susan's blog. It really is worth making.

Sunday, September 2, 2012

Sponge Fun--Happy Mail


School has started for my Grand Kids, it's still hot and the pool is closed. So I sent them a 'water fight'! Each child will receive a sponge, all they have to do is add water. It will be a perfect way to cool down after school. Each sponge weighed in at 3 ounces. A 3 ounce package costs $1.95 to send. Hopefully this will bring a smile to their sweet faces.
Giverslog has a lot of fun ways to send mail. Keep it under 13 ounces and drop it in any mailbox. Brighten a child's day with 'happy mail'!