Pages

Showing posts with label pastry. Show all posts

Monday, February 9, 2015

Lemon Tartlets


The best thing about January is the availability of Citrus Fruit. Beautiful grapefruit, several types of juicy oranges and bags of lemons. Yes, one can get lemons any time of the year but they are the best in January. These little lemon tartlets are a burst of citrus in your mouth. This recipe comes from an old Pampered Chef cook book. It is a recipe that was good years ago and is still excellent. It gives you a reason to use that 'tart tamper' that has been rolling around in your kitchen drawer. I don't use it often but when I do I love it! These little dainties are a positive addition to any dessert tray.

Lemon Tartlets
Tart Shells
1/2 cup butter, softened
1/3 cup granulated sugar
1 egg white
1 1/4 cups flour
Filling
2 eggs
1/3 cup granulated sugar
1 tablespoon butter, melted
1 large lemon
Powered Sugar
Preheat oven to 325 degrees. Spray mini muffin pan with Pam.
For tart shells--beat butter and granulated sugar until light and fluffy. Add egg white, blend well. Add flour and blend until just combined. Using small cookie scoop drop level scoops of dough into muffin pans. Press dough into cups with a well floured Mini Tart Shaper--tart tamper.
For Filling--Lightly whisk the eggs in a small bowl add butter and sugar, whisk together. Using a rasp grate the lemon peel, measure 2 teaspoons of lemon zest. Juice lemon and measure 3 tablespoons of lemon juice. Add zest and juice to egg mixture. Mix well. Pour filling evenly into tart shells.
Bake for 20-22 minutes, edges will just begin to brown. Remove from oven and cool for 5 minutes. Carefully remove tartlets from mini muffin cups. Cool completely. Refrigerate. Sprinkle with powdered sugar before serving. Makes 24 tartlets.
Printable Recipe

Wednesday, March 20, 2013

Cinnamon Biscones


I'm having a great time with The Back in the Day Bakery cookbook. They have a fun recipe for Biscones. A Biscone is a cross between a biscuit and a scone. It is a quick recipe that requires neither kneading or rolling. It was tender and delicious. Cinnamon chips were a fun addition and a light drizzle was the finishing touch.
This fun recipe will be at the front of my recipe box!

Cinnamon Biscones
1 1/2 cups Cake Flour
1 1/2 cups AP Flour
1/4 cup sugar
2 Tablespoons baking powder
3/4 teaspoon Sea Salt
1/4 teaspoon ground cardamom
2 sticks cold butter, cut in 1/2 inch cubes
1/2 cups cinnamon chips
1 1/2 cups milk
1 egg, beaten
sanding sugar
Powdered Sugar Glaze
1 cup powdered sugar
1/2 teaspoon vanilla
milk or cream to the desired consistency 

In a large bowl combine the flours, sugar, baking powder, salt and cardamom.
Cut in butter with a pastry blender, you will various sized pieces of butter from sandy patches to pea sized chunks. Add the cinnamon chips. Stir in milk and gently fold the ingredients until you have a soft dough with no flour at the bottom of the bowl. You will still see chunks of butter--don't worry, this is a good thing.
Using the large Pampered Chef Cookie Scoop, scoop the dough on a parchment lined sheet pan. Brush the dough mound with beaten egg and sprinkle with sanding sugar. Bake at 375 for 20 minutes--don't over bake.
When cool drizzle with powdered sugar glaze. These are best eaten the day they are made. This batch makes about 23 Biscones. Unless you are feeding a big crowd I would half the recipe. I'm sure the dough would freeze, just portion the mounds on parchment, flash freeze and store in a freezer bag for 1 month. To bake, put frozen dough on a parchment lined sheet and bake as directed, you may have to add another minute to the baking time.
[Printable Recipe]

One Year Ago------Coconut Pecan Chocolate Chunk Bars
Two Years Ago-----Corn Chowder
Three Years Ago----Coconut Tea Cake--TWD
Four Years Ago-----Mini Almond Cheescake

Wednesday, October 24, 2012

White Chocolate studded Pumpkin Scones--Frosted of course.


Oh I love pumpkin! I think pumpkin is a vegetable so one should eat it often--especially in scones for breakfast. It is no secret, I love scones. They are my favorite food group. This recipe is a combination of several recipes with my twist. Please enjoy. I made a double batch of scones, unbaked they freeze perfectly. After I cut them I flash freeze them then put them in a Zip Lock Freezer Bag. Make sure you label them. They keep in the freezer for a month. I had an early appointment today--no time to bake. But I remembered the scones in the freezer. They bake from the frozen state, the results were beautiful. I had a delicious treat to gift to my 11:00 appointment. Yes, that is early for this tired body!

White Chocolate Studded Pumpkin Scones--with a Spice Glaze/Frosting
2 cups flour
1/2 cup brown sugar (3.5 ounces)
1 1/2 teaspoon pumpkin pie spice
1 teaspoon baking powder
1/4 teaspoon baking soda
1/4 teaspoon salt
1/2 cup very cold butter (I put mine in the freezer for 15 minutes)
1/3 cup heaping buttermilk
1/2 cup canned pumpkin
2 teaspoons vanilla
1/2 cup white chocolate chips
In a large bowl mix together flour, brown sugar, spice, baking powder, baking soda, and salt. With a grater, grate butter into bowl with flour. Mix gently with your hands--you want to see the butter!
Mix together the buttermilk, pumpkin and vanilla. Pour over flour/butter mixture and mix gently. Add white chocolate chips. Mixture will be dry and shaggy. If you must add more buttermilk please only add a drop or two. Pour mixture on a floured piece of parchment. Knead the mass gently 3 or 4 times, it should come together nicely, it will still be quite dry. That's fine. There is plenty of moisture in the pumpkin.
Pat in a circle about 1-1 1/2 inches thick. Cut into 8 triangles. At this point you can bake off a few and freezer the rest. Whatever works for you. I do love having homemade hidden treasures in my freezer. It's like finding gold in a gold mine!
Put the scones on a parchment covered baking stone. Bake at 350 degrees for about 18 minutes. They should feel done to the touch--a toothpick should come out almost clean. Do not over bake, no one likes a dry scone!
Cool scones on a rack. When cool drizzle with this amazing frosting--I like my drizzle to make a statement!

Spice Glaze
1 cup powdered sugar
1/4 teaspoon pumpkin pie spice
2 tablespoons butter, very soft
Heavy Whipping Cream
Mix all ingredients, add cream until the desired consistency. Drizzle away!


Monday, August 6, 2012

Berry Galette TWD/BWJ


This was one fun recipe! Pies scare me but a Galette I can handle. I like the words rustic, free form and open faced. I think a galette is a pie on vacation!
The galette dough came together in just minutes in my food processor. This dough calls for cornmeal--an interesting crust ingredient. I like most anything with cornmeal so I was anxious to try it. With a well floured board I had no problem rolling out the chilled dough. I then piled blueberries in the center of the dough. I sprinkled the berries with sugar, drizzled them with a little maple syrup and dotted with butter. The crust was then folded, pleated around the fruit. I brushed the crust with water and sprinkled some sparkling sugar on top. I thought it was a masterpiece (remember I'm not a pie maker).

As it baked juice did leak out but it did not affect the taste. We all enjoyed this dessert, The cornmeal crust was delicious and the blueberries screamed 'summer'! I can't wait to make this galette with peaches and apples. The recipe stated that the galette would make 4 to 6 servings. The galette is quite small, I wouldn't try to serve more than 4 guests. A scoop of vanilla bean ice cream tops this dessert.
 Our host this week are Lisa and Andrea. Check their blogs for the complete recipe.

O

Sunday, May 13, 2012

Happy Mother's day--with a Lemon Cranberry Scone

Happy Mother's Day to all my blogging friends. I love Mother's Day. I mean who doesn't love an excuse to make all ones favorite foods. My sweet daughter Jill and I will cook dinner tonight for my Mother and Greg's Mother. Since cooking is something we love to do this is nothing but fun. Greg will do the dishes so it's a great day for sure!
 Luckily Greg had church meetings early this morning so I quickly made these Cranberry Lemon Scones. Greg would have made Biscuits and Gravy--now he does make a mean batch of Biscuits and Gravy. He has been perfecting them for months and they are good. But they just don't scream Mother's Day to me. But these Lemon Cranberry Scones do!
So if you have a bag of cranberries in your freezer these are one delicious treat. They make plenty so I froze half of the scones (uncooked). I will pop them in the oven for another tasty brunch!


Fresh Cranberry Lemon  Scones
1 1/2 tablespoons freshly grated lemon zest
2 1/2 cups all-purpose flour
1/2 cup sugar plus 3 tablespoons
1 tablespoon baking powder
1/2 teaspoon salt
3/4 stick (6 tablespoons) cold unsalted butter, cut into bits
1 1/4 cups fresh cranberries, chopped coarse
1/2 cup chopped toasted pecans
1 large egg
1 large egg yolk
1 cup cream

Preheat oven to 400°F. and line a large baking sheet with parchment paper.
In a small bowl rub lemon zest into 1/2 cup sugar--this smells wonderful!
In a food processor pulse flour, lemon sugar mixture, baking powder, salt, butter  until mixture resembles coarse meal, transfer to a large bowl. Add pecans.
In a small bowl toss together fresh cranberries and 3 tablespoons sugar and stir into flour mixture.
In another small bowl lightly beat egg and yolk and stir in cream. Add egg mixture to flour mixture and stir until just combined.
On a well-floured surface with floured hands pat dough into a 1-inch-thick round (about 8 inches in diameter) and with a 2-inch round cutter dipped in flour cut out as many rounds as possible, re-rolling scraps as necessary. Arrange rounds about 1 inch apart on baking sheet and bake in middle of oven 15 to 20 minutes, or until pale golden. Scones may be flash frozen before baking and stored in a freezer bag. Place frozen scones on parchment lined baking sheet and bake a few extra minutes.
I served these with a drizzle of lemon glaze. A 5 star recipe for sure!

Tuesday, May 1, 2012

TWD/BWJ Hungarian Shortbread

I really have no Idea why this particular treat is called Hungarian Shortbread. I will just call it excellent!
I made one big mistake --I  only made half the recipe! It was barely out of the oven and family would cut off a small square and say things like 'this is delicious' or 'best dessert ever'. Of course they would continue taking small bites until most of the pan was gone.  Please I begged save me a square that I can photograph tomorrow! Being the kind ones they are I have a few small squares to photo at first light tomorrow.

I was late making this treat I thought we had another week to procrastinate. But here we are the first Tuesday in May which happens to be May 1st! In waiting till the last minute I garnered many ideas from fellow bakers. Little helps that they thought just may improve the recipe. Now I really don't have time for failures so I took all the advice of my fellow TWD bakers because they are smart!!

I made my rhubarb jam with rhubarb freshly picked from my garden. I feel bad for those that had to pay $4.89 at Walmart for rhubarb! I cooked it longer than the said time and it was still much more runny than jam so I put it in a fine mesh sieve and it was the perfect consistency in about 30 minutes. I also added a drop of red food coloring to make it a more pleasing color.
I made my short bread as directed, and grated it into an 8 inch square pan. I cooked this layer for about 15 minutes as suggested by other bakers.
I spread my 1/2 cup of rhubarb jam over the par baked crust. I then used a box grater to grate the rest of the dough over the filling. It was easy, easy. I cooked it till light brown. Just after removing it from the oven I sprinkled plenty of powdered sugar over it.
A delicious dessert that everyone loved. I'll make it again with different kinds of jam. But the garden fresh rhubarb was an excellent addition to this sweet treat.
Our Hostess this week is Cher and Lynette check their blogs for the complete details.

Friday, March 9, 2012

Caramel Crumb Bars


This delicious treat came right out of  'The Modern Baker' by Nick Malagieri. Caramel Crumb Bars are a bit more dressy than the ordinary bars I usually make. I think it is the delicious Caramel Filling. Whatever it is this bar is one you want to make when you have company for dinner or to take to a new mother or someone who has just had surgery. It will be appreciated. I know.
So here are the directions from Nicks Cook Book.


 Caramel Crumb Bars
Dough
8 ounces (2 sticks) butter, softened
1/2 cup sugar
1/4 teaspoon salt
1 teaspoon vanilla
2 1/2 cups AP flour
Filling
4 tablespoons butter
1 tablespoon light corn syrup
1/4 cup dark brown sugar
1 16 ounce sweetened condensed milk
 Butter a 9x13 inch pan, line with parchment and butter again, makes 24 bars about 2 inches square.

1. Set rack on the lowest level of the oven and preheat to 350.

2. For the dough, beat the butter with the sugar and salt in an electric mixer on medium speed until light and fluffy. About 2-3 minutes Add vanilla.

3. On the lowest speed beat in 2 1/4 cups of the flour, scraping the bowl as needed. Mix until the dough is smooth and the flour is absorbed.

4.  Remove the bowl from the mixer and scrape 3/4 of the dough in the prepared pan. Press the dough down evenly without compressing it to much. Chill the dough lined pan. Work the remaining 1/4 cup flour into the remaining dough with your finger tips so that it forms 1/8 to 1/4 inch crumbs. Set aside.

5. For the filling, in a medium saucepan bring the butter, corn syrup, brown sugar and condensed milk to a simmer, stirring occasionally (says Nick). I burnt the batch I stirred occasionally. The second batch I stirred almost continuously, it worked much better for me. Allow the mixture to boil gently, stirring often until it starts to thicken and darken slightly, about 10 minutes. Pour into a stainless steel bowl to cool for 5 minutes.

6. Remove the dough lined pan from the refrigerator and scrape the cooled filling onto the dough, using a small offset spatula. Scatter the crumbs on the filling.

7. Bake until the filling is bubbling gently and is a deep caramel color and the dough and crumb topping are baked through about 30 minutes.

8. Cool the pan on a rack until lukewarm, 15-20 minutes. lift the slab of baked dough out of the pan and onto a cutting board before it has cooled completely. Cut into 2 inch squares.
I think when I make these again (like tomorrow) I will add some chopped pecans on top of the caramel.


Tuesday, March 6, 2012

TWD/BWJ Rugelach


Can I just tell you how proud I am! When I first looked at Rugelach I decided it would be the recipe of the month I would skip. I knew Irish Soda Bread would be no challenge. But if this baking group is to be about challenge and putting myself outside my comfort zone I better make Rugelach.
The reason I make so many cookies is the instant gratification factor. Rugelach contains no part of instant!
But I did enjoy the process once I realized it was just that a process.
I made cream cheese pastry.
I chilled.
I chopped nuts.
I toasted nuts.
I chopped fruit.
I plumped fruit.
I made prune lekvar (I didn't even know there was such a thing as prune lekvar).
I made brown sugar mixture.
I made nut topping.
I rolled pastry out.
I filled pastry.
I rolled pastry.
I chilled rolls.
I egg washed.
I sliced.
I rolled slices in nut mixture.
I baked.
I ate, and ate and ate. They were delicious!


I kind of feel like Melinda Mae in the poem by Shel Silverstein.
                   Melinda Mae

User Rating:
5.4 /10
(31 votes)


Have you heard of tiny Melinda Mae,
Who ate a monstrous whale?
She thought she could,
She said she would,
So she started in right at the tail.

And everyone said,'You're much too small,'
But that didn't bother Melinda at all,
She took little bites and she chewed very slow,
Just like a little girl should...

...and in eighty-nine years she ate that whale
Because she said she would!!! 


And I made Rugelach--because I said I would!
For complete recipe and instructions please check Jessica's blog My Baking Heart.
 

Monday, January 30, 2012

Toasted Coconut Chocolate Chunk Pecan Pie


A sweet friend, Jocelyn brought me a pie for Christmas. It just happened to be the best pie I have ever tasted. Toasted Coconut Chocolate Chunk Pecan Pie is quite a mix of delicious flavors. I now think that Pecan Pie was meant to include coconut and chocolate. This would be a perfect dessert for your Valentine
Day dinner.


Toasted Coconut Chocolate Chunk Pecan Pie
1 package refrigerated pie crusts
1/3 cup melted butter
1 cup sugar
1 cup light corn syrup
4 eggs lightly beaten
1 teaspoon vanilla
1/4 teaspoon salt
1 1/2 cup pecan halves
1 cup flaked coconut, toasted
3/4  cup semisweet chocolate chunks or morsels
Unroll 1 pie crust and place on a lightly floured surface (I love my Roll' pat), lightly brush top of crust with water. Unroll remaining crust and place over bottom crust, gently roll to a 10-11 inch circle. Fit into a 9 inch deep dish pie plate. Fold edges under and crimp.
Stir together the butter, sugar, corn syrup, eggs, vanilla and salt. Gently stir in the pecans, coconut and chocolate. Pour filling in the pie crust.
Bake at 325 for 1 hour and 15 minutes, or until set (my pie took an extra 10 minutes). Shield crust after 45 minutes to prevent over browning. Cool overnight. Serve with vanilla ice cream.
I think thr original recipe comes from Thanksgiving Point.


Tuesday, November 29, 2011

Pumpkin Scones with Spiced Glaze


 I buy the big cans of pumpkin, I don't know why, probably because my mother did. They are usually a better value but sometimes it's a challenge to use the pumpkin up in a timely manner. I found the perfect recipe to use up that last bit of pumpkin. It was a top 10 Pumpkin Recipe on Brown Eyed Bakers Blog, I trust this gal. She has yet to lead me astray!
I think if all mornings started off with a scone we would only have great days! This scone it a perfect way to start a holiday morning. I love scones because the dough freezes so well. Just cut the scones, quick freeze them and store them in a Ziploc freezer baggie. Be sure and write baking instructions on the bag and date the bag. They are best baked within 2 months. Which is not hard to do at my house. I bake half the dough and freeze half. Perfect for holiday company. They awake to the yummy smell of pumpkin and spices. They think you have been slaving in the kitchen for hours. At this point you may or may not want to tell them your secret! Enough jabber, basic scone recipe. I made a few modifications in the shaping and cutting. The delicious recipe was left intact.


Pumpkin Scones with Spiced Glaze
2 cups flour
7 Tablespoons granulated sugar
1 Tablespoon baking powder
1/2 teaspoon salt
1/2 teaspoon cinnamon
1/2 teaspoon fresh grated nutmeg
1/4 teaspoons cloves
1/4 teaspoons ginger
6 Tablespoons cold butter
1/2 cup canned pumpkin
3 Tablespoons half and half
1 large egg

Spiced Glaze
11/4 cup powdered sugar
2-3 Tablespoons half and half (more or less as needed)
1/4 teaspoon cinnamon
1/8 teaspoon nutmeg
1 pinch each ginger and cloves

Preheat oven to 425 degrees, line a stoneware baking sheet with a silpat or parchment paper. Set aside
Combine first eight dry ingredients in a large bowl. Use a pastry blender to cut in butter, or use my favorite method; freeze the butter and grate on a large hole grater, perfect size butter. It mixes in quickly.
In a smaller bowl whisk together the pumpkin, half an half and egg. Pour the wet ingredients in the dry ingredients. Mix oh so gently. On a lightly floured surface form the dough in two balls. Flatten gently to about 1 inch thick. Use a sharp knife or pizza cutter to make 6 wedges in each circle. Place wedges on baking sheet and bake at 425 for 14 minutes, do not over bake. I just like a very light color. Over baking will dry them out and then they won't be as yummy. We have made it this far so no over baking!
Cool scones and drizzle with Spiced Glaze (simply make glaze by mixing all ingredients together to get the consistency you want). Enjoy! Next time I make these yummy scones I will add 1/2 cup chopped pecans. Because I can and I think they would add to the flavor and nuts always add a fun textural intrest.


Tuesday, July 19, 2011

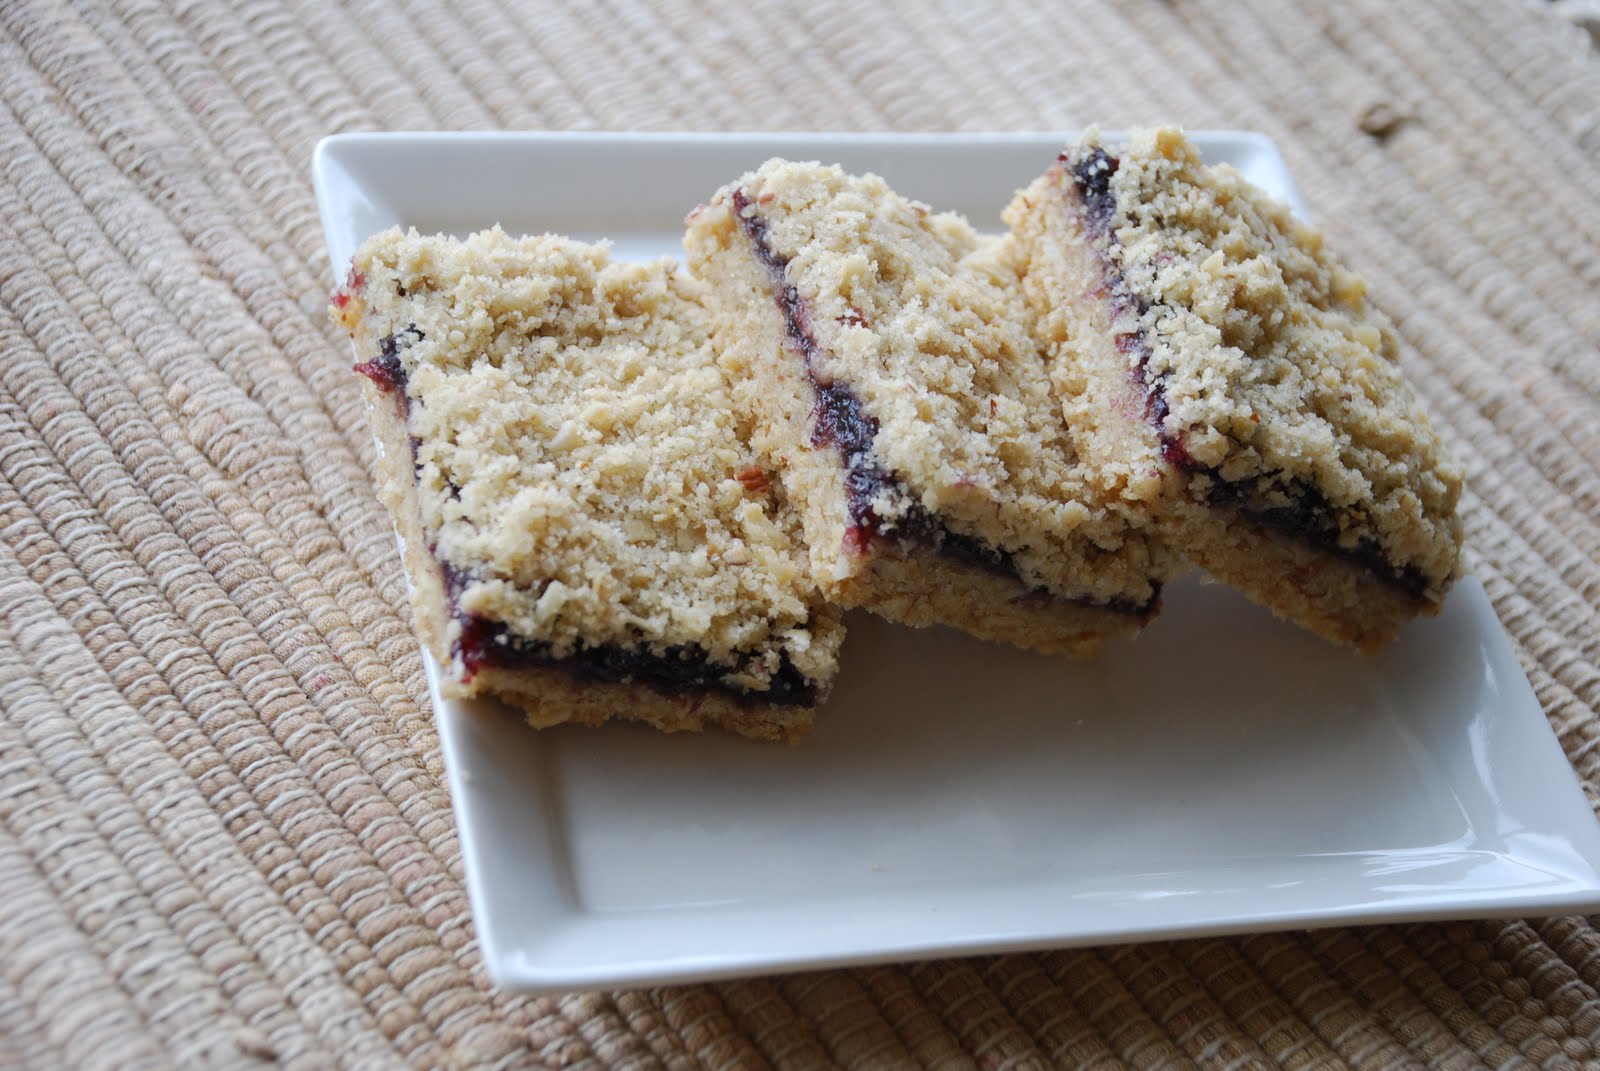
Raspberry or Blueberry Squares


My good friend Nancy loves blueberries so it seemed only right to make her a great blueberry dessert for her birthday. We were going to lunch and I wanted something that I could hand out to our friends. These blueberry bars fit nicely in glassine envelopes.

I didn't have time to search through blogs and find something that might work, so I opened one of my American Test Kitchen cookbooks and found just the right recipe. I always enjoy reading just how and why ATK came up with the recipe they did. They test and test and then retest until it is perfect.I have yet to be disappointed. So I hope you enjoy Blueberry Squares, we did!


Blueberry Squares--American Test Kitchen
Lining the pan with foil is helpful on two accounts. It makes removal of the squares for cutting very easy (just lift the entire block and place it on a cutting board.), clean-up is a breeze. For even bars and a nice presentation trim 1/4 inch off the outer rim of the uncut block. The outside edges of all the cut squares will be neat


1 1/2 cups flour
1 1/4 cups quick cooking oats
1/3 cup granulated sugar
1/3 cup brown sugar
1/4 teaspoon baking soda
1/4 teaspoon salt
1/2 cup finely chopped pecans, almonds or a combination
12 tablespoons butter, cut in 12 pieces, softened but still cool
1 cup blueberry or raspberry preserves
1.  Adjust pan to lower middle and heat oven to 350 degrees. Spray a 9 inch square baking pan with Pam.Fold two 16 inch pieces of foil lengthwise to measure 8 inches wide. Fit one sheet in the bottom of the pan, pushing it into corners and up the sides of the pan.Fit the second sheet in the pan in the same manner, perpendicular to the first sheet. Spray foil with Pam
2.  In the bowl of a standing mixer, mix the flour, oats, sugars, baking soda, salt and nuts on low speed until combined, about 30 seconds. With the mixer running at low speed, add butter pieces, continue to beat until mixture resembles wet sand about 2 minutes. You will have a little over 5 cups of crumbs.
3.  Transfer 2/3 of the mixture to the prepared pan. Press the crumbs evenly into the bottom of pan, I use the bottom of a metal measuring cup. Bake about 20 minutes or until starting to brown. Using an offset spatula spread the preserves evenly over the bottom  crust. Sprinkle the remaining crumb mixture over the preserves. Return to oven and bake until the preserves bubble around the edges and the top is golden brown, about 30 minutes. Rotating pan half way through. Remove from oven and place on a cooling rack for about 1 1/2 hours. Remove cool bars from the pan with foil handles, remove foil and transfer to a cutting board. Cut in squares 1 1/2x1 1/2 inches. Delish!

Friday, July 15, 2011

Summer Fruit Galette TWD

I have been wanting to make a Galette for ages, I love the rustic look.  Rustic looks simple, like maybe I could make this type of pie. Jill is visiting so after the kids were in bed we attempted our first Galette. What a fun pie. I can see many more Galettes in the future.


This recipe comes from Dorie Greenspan's cookbook "Baking From My Home to Yours". We used raspberries for our Galette, the last 15 minutes of cooking a custard is poured around the berries. What a great combination. The complete recipe can be found on Tina's blog My Domestic Bliss. She has some great photos and exact instructions.
If you have yet to make a pie a Galette is the place to start. We know.

Friday, April 15, 2011

Quiche Supreme


Do real men eat quiche? I think that was a book from the 70's, we have often joked about quiche. I happen to love quiche and have tried to get the men in our family to love it to. Do they? Well, they do love quiche, especially if it has plenty of meat in like this recipe. It must be served with a side of salsa and a dash of Cholula's. And last but probably most important, it can't be served too often. I on the other hand could eat quiche for lunch several times a week.
Quiche Supreme
9-inch pie crust--straight from the freezer section at Walmart or you could make your own
1 cup shredded Swiss cheese, or cheddar, or jack--pepper jack is fun
6 slices bacon, cooked and crumbled
3/4 cup ham, minced
2 green onions, chopped
1/2 green or red pepper, diced
3 eggs
1 cup heavy cream or half and half
1/2 tsp. grated lemon peel
1/2 tsp. salt
1/4 tsp. dry mustard
Bake unpricked pie crust for 5 minutes at 425 degrees. Remove from oven and sprinkle ham, bacon, cheese, onion and pepper on crust. In a medium bowl, combine eggs, cream, lemon peel, salt, and dry mustard. Pour evenly over cheese mixture. Bake at 325 degrees for 45 minutes or until set. Remove from heat and let stand about 10 minutes before serving. Serve with salsa or diced tomato. Serves 6.


Recipe adapted from Recipe Shoebox
Friday, February 11, 2011

Shortbread Tarts


My girls can cook, when they come home for girls weekend they cook for me! Candise made these yummy tarts for us to enjoy. And we did enjoy them. Perfect for a Valentine treat. Candise found this recipe on Joyofbaking. It is yummy.

Shortbread Tarts
1 cup (2 sticks) butter
1/2 cup powdered sugar
1 tsp pure vanilla extract
1 1/2 cups all purpose flour
2 T cornstarch
1/8 tsp salt


Cream Cheese Filling
8 oz cream cheese
1 can (14 oz) sweetened condensed milk
1/3 cup fresh lemon juice
zest of one lemon
1 tsp vanilla


Garnish
Raspberries, blueberries, sliced strawberries, kiwi, blackberries


Spray 36 miniature muffin tins. Set aside. Preheat oven to 325 degrees and place rack in the center of the oven. 


In the bowl of your electric mixer, or with a hand mixer, beat the butter and sugar together (approximately two minutes). Beat in the vanilla extract. Add the flour, cornstarch and salt and mix just until incorporated.  

Divide the dough into 36 even pieces and place one ball of dough in the center of each muffin tin. With your fingertips, or a tart press, press the dough up the sides of the individual muffin tin so there is an indentation in the center. Once filled, place the tart pan, with the unbaked shells, in the freezer for about 10 minutes so the shortbread can become firm. (This will help to prevent the shortbread from puffing up during baking.)

Bake for approximately 16-18 minutes or until lightly browned. About halfway through the baking time, lightly prick each shortbread, with the tines of a fork, if they have puffed up. Check again after another five minutes and prick again if needed. Once they are fully baked, remove from oven and place on a wire rack to cool. When completely cooled, remove the tarts from the pan. (These may be made in large quantities and frozen.)

Cream Cheese Filling: In your food processor or electric mixer, beat the softened cream cheese until fluffy. Add the condensed milk, lemon juice, zest, and vanilla and process just until smooth.(Do not over process or the filling will be too runny.) Transfer the filling to a bowl, cover, and refrigerate until serving time. (It is best to make the filling at least a day in advance to give it time to become firm and for all the flavors to mingle).

To serve: Using a Pampered Chef Decorator, or two small spoons, fill the tart shells with the cream cheese filling. The filled tart shells can be made several hours in advance and refrigerated. Just before serving top with fresh berries or cut up fruit.