Pages

Wednesday, October 17, 2012

Pecan Chewies in a Jar


I needed a quick birthday gift--by quick I mean something that I could make at home! I'm also testing some Christmas gift ideas. So out came my Cookies in a Jar Cookbook by Jackie Gannaway. It is dated 1997. Mason Jars are trendy now--check Pinterest--I guess this book was before it's time, it is 15 years old. But age matters not, I layered a Jar and it was beautiful; then I baked a jar. I was not about to give away a cookie mix that wasn't delicious! I'm happy to say this recipe was a winner. I think it would be a good idea to always have a jar or two made. They could be used for unexpected birthday or hostess gifts. The lady I'm giving it to has Grandchildren that visit often--this would be a perfect activity. Kids would love making these cookies.
There are 26 recipes in the book. I made Pecan Chewies--you can too!


Pecan Chewies in a Jar
In a clean wide mouth quart size canning jar layer the following ingredients in the order given. Using a Tart Tamper compress each layer, this is a must. If you don't follow this step all the ingredients will not fit in the jar. Let's layer:
1/2 cup sugar
1/2 cup brown sugar (3.5 ounces), yes I do weigh my brown sugar. I found I was using a heavy hand at the 'firmly packing' step. Cooking by weight has improved my baked goods
1 1/4 cup old fashioned oats
3/4 cup finely chopped pecans
1 cup crisp rice cereal (this also got packed down a little)
3/4 cup flour mixed with 1/2 teaspoon baking soda, 1/2 teaspoon baking powder and 1/4 teaspoon salt.
Cover with a clean lid--top with a fun tag and instructions.
To make cookies, in a large bowl mix together 1 square very soft butter, 1 beaten egg, 1 tablespoon vanilla. Add contents of the jar and mix. You will need to finish mixing with your hands!
Using a medium Pampered Chef Cookie scoop put dough ball on parchment lined cookie sheets. Bake at 350 for 12 minutes or until edges are lightly brown. The recipe makes about 2 1/2-3 dozen cookies.
 I couldn't help myself--I did drizzle some of the cookies with white chocolate. They were both delicious. These will be part of my Christmas gifts this year. I will make them a week or so before Christmas. They are best used within about a month. They can be stored longer--the brown sugar may harden a little. Enjoy. These are a fun treat!


Sunday, October 14, 2012

Pumpkin Pie Spice


I know Pumpkin Pie Spice is not life changing. Today I needed 1/4 of a teaspoon of the spice. I decided just to mix a batch and be prepared for the coming holiday baking.
I don't buy pumpkin pie spice--why should I, I have all the spices in my spice rack. A Google search turned up several recipes for the common autumnal spice. After much review I made a mix that should suit my needs. I plan to have a cute jar with a fun label to put the spice in but the holiday baking season could be over by the time I get that done. So please make a batch of Pumpkin Pie Spice and be prepared for the coming baking season!
 Pumpkin Pie Spice
1/4 cup cinnamon
2 Tablespoons ginger
1 Tablespoon nutmeg--fresh grated
1 Tablespoon cloves
Mix together and use this season--make a fresh batch next year!

What did I need my 1/4 teaspoon pumpkin pie spice for?? Stay tuned for a yummy dessert featuring pumpkin cheesecake and chocolate--two flavors that are delicious together.
Linking to the HOST

Wednesday, October 10, 2012

Chicken Satay


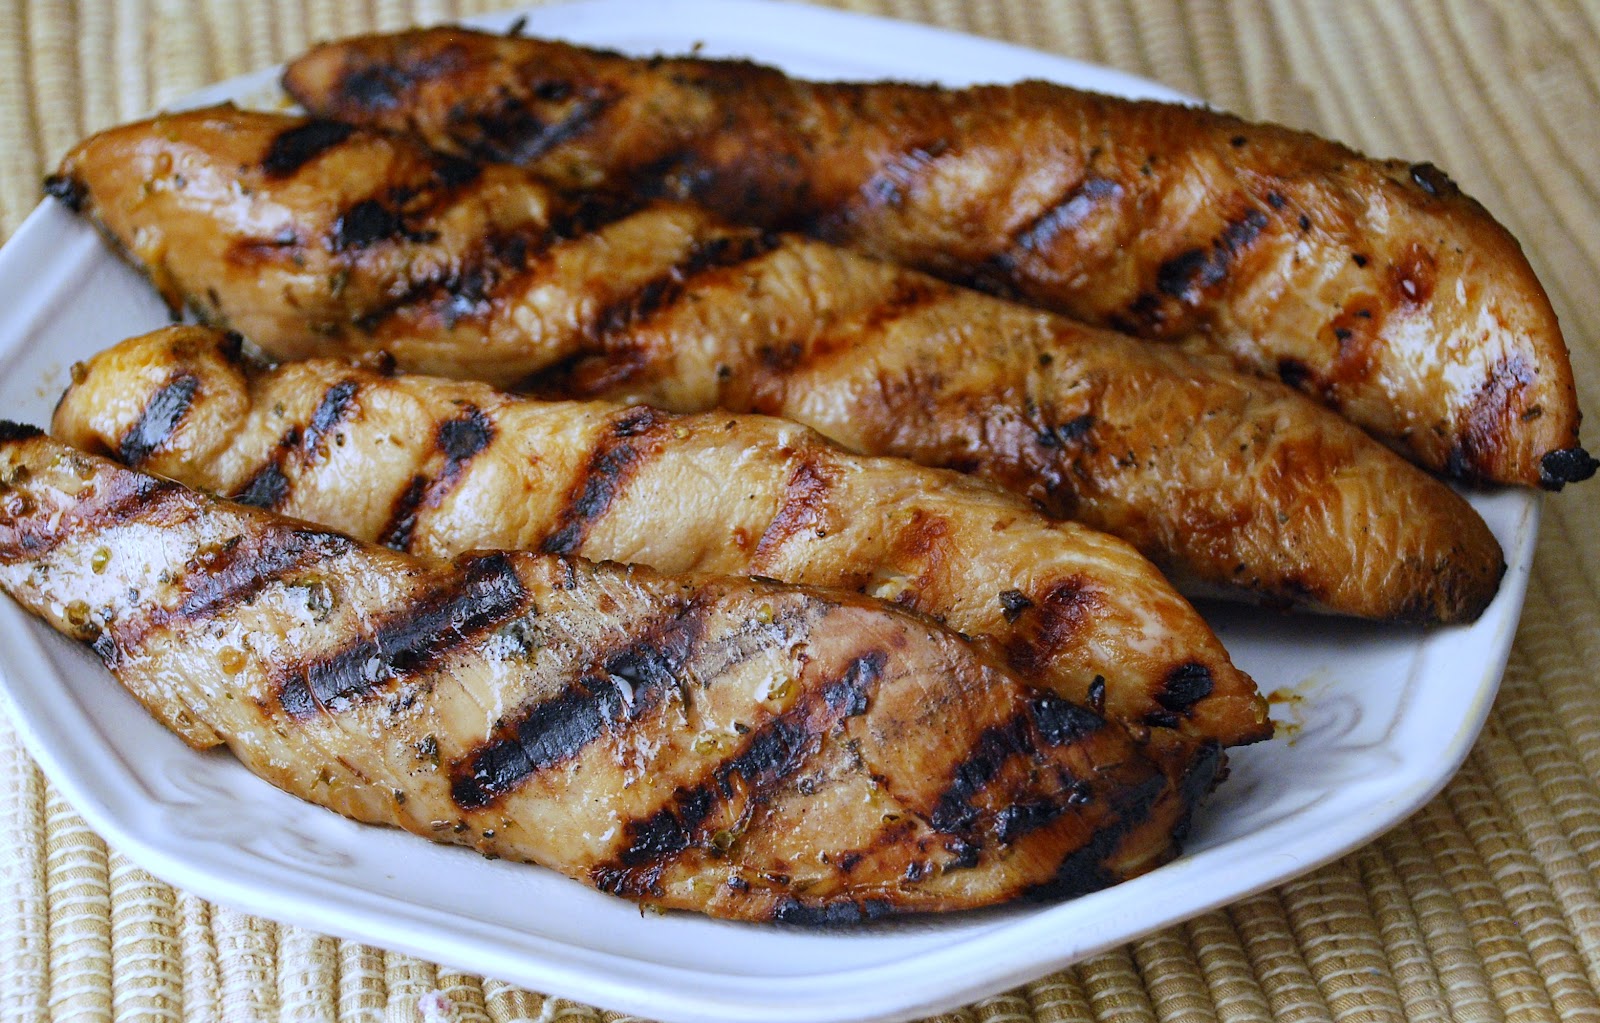
When we eat at Thai Restaurants we often order Chicken Satay as an appetizer. When we eat good food we want to figure out how to make it at home. Thanks to the cooking skills of my daughters we can now enjoy this delicious dish at home. This is Amber's recipe, Candise made it for us last time she was here. It is easy and so yummy, we served it with Jasmine Rice and Stir Fried Veggies. It was one delicious meal.
We now have mastered Coconut Curry Soup and Coconut Shrimp Curry but I still need to visit my favorite Thai Restaurant for their Mango Sticky Rice with Coconut Ice Cream! That dish is amazing, such a treat.


Amber's Chicken Satay


Approx. 1 1/2 lbs boneless skinless chicken tenders
Marinade:
1/2 cup peanut butter
1/4 cup peanut or vegetable oil
2 Tbsp. white wine vinegar
2 Tbsp. fresh cilantro, chopped
1/2-1 tsp. red pepper flakes or a small squeeze of Sriracha--maybe 1/4 teaspoon
1/4 cup soy sauce
2 Tbsp. lime juice
3 garlic cloves, minced or pressed
2 tsp. finely copped fresh ginger root
1 Tbsp. sugar

1. Cut the chicken tenders in half lengthwise.
2. Mix marinade ingredients and whisk or stir until smooth. (I just buzzed everything in the food processor) Add a few Tbsp. of water if too thick. Reserve 1/2 cup for dipping, if desired. Marinate chicken 20 minutes or longer.
4. Using metal or bamboo skewers, skewer chicken pieces.
5. Grill 8-10 minutes or broil for 5 minutes on each side.

Zucchini or red pepper pieces are also good in this marinade and grilled. 


Monday, October 8, 2012

Great Pumpkin Bread


Last week I made a raised pumpkin bread, it was delicious but when I think of pumpkin bread I think of quick pumpkin bread. Made with lots of sugar, oil, spices and chocolate of course. So I did some research and found a recipe on the King Arthur Flour blog. It was just what I wanted and had many great reviews. I read thru the recipe, made a few changes to suit my tastes and came up with one Great Pumpkin Bread. It is moist, delicious and is dotted with chocolate and nuts. It's delicious. I found myself wanting to spread a layer of butter on it but it really doesn't need it. This bread stands on it's own. It's better the second day--so hide it!


Great Pumpkin Bread
3/4 cup vegetable oil
1/4 cup applesauce
2 2/3 cups sugar
4 large eggs
2 cups pumpkin
2/3 cup water
2 cups flour
1 1/3 cups whole wheat flour
1/2 teaspoon baking powder
2 teaspoons baking soda
1 1/2 teaspoons salt
1 teaspoon fresh grated nutmeg
1 teaspoon vanilla
1 cup chopped nuts
1 cup mini chocolate chips
In the bowl of your mixer beat together oil, applesauce, sugar, eggs, pumpkin, vanilla and water. Mix well. Add flours, baking powder, baking soda, salt and nutmeg. Stir in nuts and chocolate chips.
This recipe made two 8 1/2 by 4 1/2 pans and one mini loaf. Bake in pans that have been sprayed with Pam for Baking. Bake at 350 degrees. Check the small pan at about 30 minutes the large pans will take at least 60 minutes. Bread is done when a tooth pick comes out clean. Let rest in pans for 10 minutes and remove bread to cool on cooling rack. I had no trouble removing my bread from the pans. I had just purchased new pans from KAF--they are wonderful. If you are worried about bread sticking grease and flour pans or line pan with parchment paper and grease. I also think using mini chocolate chips prevents sticking. Sometimes regular chocolate chips sink and cause problems when removing bread, experience is a great teacher. I only use mini chips in quick breads.


 One year ago--Basic Biscuits
Two years ago--Pumpkin Oatmeal Cookies
Three years ago--Basil Pesto

Friday, October 5, 2012

Almost Like Pioneer Woman's Lasagna


It's custom in the Harris House to let the birthday person choose the menu. Jess wanted Lasagna and Flip Over Plum Cake. Now I will be the first to admit that although I have made lasagna I have never found 'the' recipe. Well the hunt is over for the perfect Meaty Lasagna. Pioneer Woman pulled through again. I used her basic recipe and just changed it where it made sense for me to change. Check her blog for a very complete detailed recipe. The basics are covered here.


Almost like Pioneer Woman's Lasagna
1 pound ground beef
3/4 pound Jimmy Dean Hot Sausage
3 cloves garlic
1 teaspoon salt
1 can 28 ounces whole tomatoes
2 cans 6 ounce tomato paste
2 Tablespoons Dried Parsley or 6 tablespoons fresh parsley finely chopped
2 Tablespoons Dried Basil or 6 tablespoons fresh basil finely chopped
3 cups cottage cheese
2 eggs
1/2 cup Parmigiana Regino cheese, finely grated or Kraft Green cheese
2 Tablespoons Dried Parsley or 6 Tablespoons fresh  Parsley finely chopped
1 teaspoon salt
1 pound shredded mozzarella cheese
1/2 cup Parmigiana Reggino cheese--finely shredded or Kraft Green
9 ounce package of  'needs no cooking' lasagna noodles--I used Barilla
Combine ground beef, sausage and garlic. Cook until browned, drain fat. Add tomatoes, tomato paste 6 tablespoons fresh parsley, fresh basil and salt. Simmer the sauce for 45 minutes stirring occasionally.
In a bowl mix cottage cheese, beaten eggs, grated Parmigiana Reggino cheese and 6 more tablespoons of fresh parsley, add 1 teaspoon salt. Stir together,
As per the instructions on the no cook lasagna box, add 1 cup of water to your sauce. I made a 9x13 pan and a 8x4 inch pan to put in the freezer. Spread a little bit of sauce on the bottom of each pan. Layer lasagna noodles, don't overlap. Spoon half of the cottage cheese mixture over the noodles. Cover cottage cheese with a layer of mozzarella cheese. Spoon a little less than half the meat sauce over top. Repeat, ending with meat sauce mixture. Sprinkle the top generously with Parmesan cheese. Either freeze or refrigerate up to 2 days. To bake immediately cover with foil and bake at 350 for about an hour or until heated thru and lasagna noodles are cooked. This dish was delicious! Leftovers heated up nicely and tasted delicious. Everyone was happy. I like using the no cook noodles, just make sure and add extra liquid to your sauce as the noodles will absorb it while cooking. Also for the noodles to cook you must cover the pan with foil and cook for about an hour--it takes that long to cook the noodles.
I did not use the entire box of noodles--this is a meaty, saucy lasagna recipe. Just how my family  likes it. Perfect served with a slice of crusty garlic bread.
I used fresh herbs because I had them growing outside my front door. Dried would also be fine. Good luck and enjoy this yummy make ahead meal. Put it on the schedule for your holiday baking.
Printable Recipe

1 year ago--One Good Hot Roll
2 years ago--Double Apple Bundt Cake
3 years ago--Banana Pecan Cup Cakes

Monday, October 1, 2012

Cranberry-Walnut Pumpkin Loaves--TWD/BWJ


This is one full body loaf and  it is delicious. I usually wait till the last minute to bake my recipes for TWD. I am a procrastinator by nature but I like to read the P&Q section on the TWD site. I always get great tips from bakers that aren't procrastinators! This recipe I'm sorry to say had more than a few negative reviews. I almost didn't make it, but really how can anything with cranberries, pumpkin and walnuts not be delicious.
So I baked.

This is not a quick bread which surprised most of us. It is a yeast bread that requires mixing 15 minutes in the trusty Kitchen Aid, a rise of 2 hours then an overnight rest in the refrigerator. Day 2 requires a four hour rest and a two hour rise. This sounds like forever but really there isn't much hands on time. The dough responded just like the recipe said it would (I love when that happens)! We were rewarded with the delicious smell of holiday baking and a yummy loaf of 'fall' bread.
I used pecans in place of walnuts and I replaced half of the golden raisins with King Arthur's Fruit Cake Blend Dried Fruit. The bread is light but stands up to the weight of all the added goodies. This recipe welcomes fall and I think you should make it!
Check Rebecca's blog The Bountiful Harvest  for the complete recipe.

Thursday, September 27, 2012

Cinnamon white chocolate, Cranberry Bars


This is just a basic 7 Layer Bar--on steroids! It's amazing what happens when one adds cinnamon chips, white chocolate chips and dried cranberries to a simple recipe. Every bite contains a surprise. This is one delicious bar!

I made this bar twice--the first time I used the instructions on a popular blog. My results were less than stellar. The recipe had you drizzle the sweetened condensed milk on top of the crust. then add the toppings and baked it. The recipe was good but not great. The crust was soggy. I knew this recipe could work. It is a popular recipe with many great variations.
So I went to my Americas Test Kitchen, The Best American Classics Cookbook. A variation of this recipe is pulled apart and made wonderful. I used the technique in the ATK cookbook applied it to this recipe and it turned out just the way I wanted it. I love ATK cookbooks. I always wonder why things do or do not work in cooking/baking. My questions are always answered. I own several ATK cookbook and consider each one a treasure. If you read cookbooks like novels--as I do these are the cookbooks for you!
So here is the ATK version with some seasonal twists. I have my good friend Carol to thank for this recipe. She brought me a plate of these and the search began!

Cinnamon, White Chocolate Cranberry Layer Bars
1 cup sweetened coconut
8 tablespoons butter
8 whole graham crackers, 4 ounces, crushed (Place the crackers in a large zipper lock bag and pound them with a smooth mallet. The result should be an assortment of crumbs, bits and chunks that measure about 1 1/2 cup.)
1/2 cup chopped pecans or walnuts
1 cup white chocolate chips
1 cup cinnamon chips
1/2 cup dried cranberries
1 (14 ounce) can sweetened condensed milk
Heat oven to 350 degrees. Spray a 9x13 inch pan. Cover with foil, spray again. Spread the coconut on a baking sheet and bake until the outer flakes just begin to brown, about 8 minutes (don't multitask on this one, coconut burns easily! I know.) At the same time place the stick of butter in the 9x13 inch pan. Put it in the oven for about 6 minutes and let the butter melt (I guess this is multitasking, just be careful)!
When the butter is melted remove the pan from the oven and sprinkle the graham cracker crumbs over the melted butter. Toss lightly until all the butter is absorbed and the crumbs are evenly distributed. In order sprinkle the nuts, white chocolate chips, cinnamon chips, coconut and dried cranberries over the crust. Pour the entire contents of the sweetened condensed milk evenly over the dish. Return to the oven and bake until top is golden brown, about 25-30 minutes. Cool on a wire rack at least 2 hours. Remove from pan, remove foil and cut into bars.

1 year ago--5 Minute Fudge
2 years ago--Rosemary Bread
3 years ago--Banana Pecan Cupcakes

Tuesday, September 25, 2012

Garden Tomato Soup


 When I need new recipes I often just ask one of my daughters. They are always cooking something good. Candise loves to garden and has had a large garden plot since she has lived in Idaho. Not just a few plants but a garden that provides enough produce that she cans plenty. I enjoyed many years of canning. Canning
food, especially if you have grown it is a very satisfying activity. Jars of fruits and veggies lined up on the shelves of a storage room is a beautiful thing. Here is a shout out to all those who can!

This recipe is made with garden fresh produce. Can you can it? I really don't know but consult your Ball Blue Book or your County Extension Agent. They know everything there is to know about canning food in your locale.
I have a great recipe for Quick Tomato Soup--made with canned tomatoes. It is delicious, I make it often. But when your garden is full of tomatoes, onion and basil this soup can't be beat. Try it. 


 Garden Tomato Soup
 2 Tbsp olive oil
1 large onion- diced
A handful of fresh basil
8 cups tomatoes, peeled and quartered
2-3 T. tomato paste
3 cups chicken broth
1 t. sugar
Salt and pepper to taste
3/4 to 1 cup cream

Saute the onion in the olive oil until brown, then add basil and saute.  Add tomatoes, broth, tomato paste, and sugar.

Let soup simmer for about 15 minutes, then blend to desired consistency with immersion blender.  Taste and add salt, pepper, or more tomato paste if necessary.  When simmered to desired consistency, add cream.

You can also blend the tomatoes prior to adding to onions and basil – but I like the thickness of blending them with the broth/onions/etc.
This recipe is what tomato soup should be, fresh, flavorful and a little creamy. Perfect.
This recipe made plenty, I served it with grilled cheese sandwiches for a delicious fall meal. It would probably freeze but I would not add the cream until I served it. Cream doesn't always freeze well.

This recipe is a reason to own an Immersion Blender. It makes quick work of what could be a messy job. 

Sunday, September 23, 2012

Barbequed Turkey Tenders


This is a simple recipe that we have been making for years. It is often requested for birthday dinners. Our local neighborhood grocery store always carries boneless turkey tenders, turkey steaks would also work. This simple marinade transforms turkey into a delicious meat that can now be served more often than just Thanksgiving. This is also yummy as a marinade for chicken kabobs.

Barbequed Turkey Tenders
1/2 cup oil
1 cup 7 Up--not sugar free
1/2 cup soy sauce
1 teaspoon horseradish
2 teaspoons italian seasoning
Turkey Tenders or steaks
Mix ingredients together. Add turkey tenders, let marinate for up to 24 hours. Grill tenders until internal temperate reaches 160 degrees.


Tuesday, September 18, 2012

Whole Wheat Loaves TWD/BWJ


Making bread has been a big part of my life.  With 6 children at home making homemade bread was a necessity. We went through plenty of peanut butter sandwiches. Making bread was a big savings. I had a Bosch Bread Mixer and a wheat grinder that sounded like it had an airplane engine! I made 6-8 loaves of bread every week. Over the years my bread making has all but subsided--how much bread can two people eat? I do however believe in the skill of bread making. My daughters are great bread makers. If you master the art of bread making you can be the hit of any gathering. A pan of hot rolls is always welcome! A loaf of homemade bread and a jar of jam makes a wonderful hostess gift.


So what happened to my bread today?? Well, as I said making bread is a skill--if not practiced one becomes rusty. I started out great. Fresh yeast, freshly ground flour. I was off to a great start, the dough felt perfect and it raised as it should. My problem was in my pans. Yes, pans. I didn't have the sized specified in the recipe so I used pans that were too big. I let the dough raise to much and when it hit the heat the loaves deflated. The bread was too coarse. This was my fault, not the recipe! I asked Hubby's advice on how to photograph my less than perfect loaves. Cut thick slices was his remark. So I did. This bread didn't taste bad. I will give it another try. These loaves will become salad croutons.
Hopefully my fellow TWD bakers had better luck. Check Michele and Teresa's blogs for the complete recipe. And learn to make bread--it's a good thing to do.

Monday, September 17, 2012

Fresh Tomato Basil Pasta


There is nothing like getting a new cookbook to rekindle your cooking excitement. Thanks to Amazon Prime I can have a new cookbook soon. I do love instant gratification, I don't wait really well. So I guess the cookbook I purchased was just right for me it is Giuliano Hazan's Thirty Minute Pasta--100 quick and easy recipes.
My good friend Kayte has been singing praises for this cook book for ages now. She and a few friend make a new recipe each week and post on the same day. It is pretty casual but it is always fun to see what they post. So I purchased the cookbook and there really are recipe after recipe of very simple pasta meals.
My first recipe had to be one that utilized my garden fresh tomatoes and fresh basil. These two items won't last much longer. The recipe was easy and delicious. Kayte said she cooks extra pasta and keeps it in the fridge. Getting dinner on the table becomes that much quicker.
I will give the recipe as I made it--just a few variations that didn't change the outcome.

Angel Hair Pasta with Fresh Tomato, Olive Oil and Basil
2 pounds fresh ripe tomatoes
4 garlic cloves
3 tablespoons extra-virgin olive oil
1/8 teaspoon red pepper flakes (scant)
10 fresh basil leaves
8 ounces cooked pasta
Drop the tomatoes in boiling water, leave for 60 seconds. Remove and run under cold water, skins will slip right off. Dice tomatoes in 1/2 inch dice
Peel and thinly slice the garlic. Put the garlic, 2 1/2 tablespoons of olive oil and red pepper flakes in a 12 inch skillet. Place over high heat. The moment the garlic begins to sizzle add the tomatoes and season generously with salt. Cook for 15 minutes, stirring occasionally until most of the liquid has evaporated. Coarsely shred the basil and add to the sauce. Continue cooking until all the liquid is evaporated.
Add the sauce to pasta that has been cooked in salted water until al dente. If you are using pasta that has been cooked earlier in the day or week either submerge in hot water for a moment or microwave till hot. Serve sauce with pasta. Drizzle individual serving with olive oil, we also added pepper. We added a sprinkle of fresh grated parmigiano reggiano cheese. It was delicious. I served it with crisp bakery toast. It was a very filling meal.
This amount of sauce made 4 adult servings. But the recipe called for 16 ounces of pasta for 4 servings. 8 ounces was plenty of pasta for us.
Will I make it again--yes! You just can't go wrong with fresh tomatoes and basil.

Friday, September 14, 2012

Autumn Granola


I have 6 granola recipes on my blog, do I really need one more? Yes I do. This beautiful granola gets it's fall colors from some delicious dried fruit that I purchase from King Arthur Flour. It is their Fruitcake Blend but  don't let the word fruitcake scare you. This is my favorite blend of dried fruit because the pieces are small but the flavor isn't. It contains dried pineapple, golden raisins, apricots, cranberries and dates. Beautiful little bites of fall. I made two batches, one for me and one to share. Who doesn't like a bag of homemade granola.

Autumn Granola---inspired by Cooking For Seven

4 cups oatmeal
1 cup coconut
1 1/2 cup nuts (I used walnuts but use what you love)
1/4 teaspoon salt
4 ounces butter (melted)
1/4 cup pure maple syrup
1/4 cup honey
1 tablespoon pure vanilla
1 cup dried fruit
Mix oatmeal, coconut, nuts and salt in a large bowl. Melt butter, add syrup, honey and vanilla. Pour over oat mixture and stir well. Spread on a sheet pan. Bake at 300 degrees for 30-40 minutes. Stir often. When granola is cool add dried fruit.


Tuesday, September 11, 2012

Peanut Butter Granola


I had been baking one day and my sweet niece stopped in to sample my creations. The Peanut Butter Bars are always a hit. I made a batch of brownies that although not bad didn't make the blog cut. We came to the Peanut Butter Granola--I had Lacy sample it (now Lacy is expecting so factor that in). She like it, she really liked it. I suggested that I would probably serve it with fresh fruit and Greek Yogurt. She smiled and said, I think it would be good on ice cream! Lacy was right on. It was delicious on Vanilla Bean Ice Cream with a drizzle of chocolate! Yes, I also enjoyed it for breakfast with yogurt and fruit. However you serve it, it's delicious. Inspired by a recipe on Liv Life.

Peanut Butter Granola
4 cups oats
6 tablespoons ground flax meal
1/2 teaspoon salt
1 cup creamy peanut butter
1/2 cup brown sugar
drizzle of honey
2 teaspoons vanilla
2 egg whites, lightly beaten
Mix oats, flax meal and salt. Set aside. On low heat warm peanut butter, brown sugar and honey. Add vanilla. Mix with oatmeal stir well. Stir in egg whites. Spread granola on sheet pan. Bake at 325 for 20-30 minutes stir once. I like my granola crispy so I baked it a little longer.

Monday, September 10, 2012

Chocolate Peanut Butter Cookies and The Night Time Baker!


Coming home from school was my favorite part of the day. Mom was always home, as soon as I opened the door I knew just what she had been doing. More often than not wonderful smells hit me. Chocolate cake, cookies, fresh bread, cinnamon rolls and maybe in winter a pot of beef stew. School cares were left at the door as we ate a home baked treat and chatted about our day.
I do think the power of smells is magical.


We had been married about 13 years, we had 6 small children and hubby was the mayor of our very small but rapidly growing town. He had meetings every week--oft times the meetings would get heated, tempers flared. My mild mannered hubby put up with this surprisingly well. I wanted home to be a place of love and happiness--and good smells! Hubby's meetings often went till late at night. I think that is when I became the "night time baker". I remembered my childhood and how troubles seemed to melt away at the smell of good food. So I put it to the test. Luckily my kids had early bedtimes. Once they were asleep the kitchen came to life. I would make brownies one night, cookies another and occasionally sweet rolls with caramel frosting.
Hubby opened the door from his harried meetings and a waft of delicious smells greeted him. I'm not saying all his problems disappeared but a waft of deliciousness met him at the door.


This tradition continued through another 5 years as he served as the Bishop of our church congregation. Starting a batch of brownies at 10 PM is normal at my house. Then breakfast is taken care of too!
Why this ramble down memory lane? Hubby spent a week in Alaska, he didn't get home till 10 PM. I started these yummy Peanut Butter Chocolate cookies at 9. He opened the door to hugs, kisses and a waft of sweetness. That is a good thing! And these are one delicious cookie. Very soft--don't be tempted to over bake. The drizzle of chocolate is the perfect finish. These would be yummy any time of the day or night!

Chocolate Peanut Butter Cookies
1 1/3 cup flour
1 teaspoon baking soda
1/4 teaspoon salt
1 cube butter (4 ounces)
2/3 cup smooth peanut butter
1/2 cup granulated sugar
1/2 cup brown sugar (3 1/2 ounces)
1 egg
2 teaspoons vanilla

In a small bowl whisk together the flour. baking soda and salt.
In your mixer put softened butter, peanut butter and sugars. Mix about 3 minutes. Add the egg and vanilla and mix well. Gently stir in the flour mixture. Please don't over mix. Bake at 350 degrees on parchment lined stoneware. Did you know you can get huge rolls of parchment paper at Costco. It's by the plastic wrap and foil. I do love my big roll of parchment paper!
I use my small Pampered Chef Scoop for these little gems. I did flatten them slightly before cooking. Bake for 9-11 minutes. My cookies needed the 11 minutes. Cool cookies for a few minutes on the sheet pan--they have to set up. When they can be safely moved to a cooling rack you are ready to pop them in the freezer for a few minutes. I'm usually in a hurry and the freezer is my friend! This batch makes about 3 dozen smallish cookies.

For the drizzle put 1/3 cup milk chocolate chips and 1/3 cup semi sweet chocolate chips in a heavy duty zip lock baggie. Add a heaping teaspoon of Crisco. Seal the bag and melt in microwave. My micro wave has a setting for melting chocolate--I love it. Without a setting just melt it at 50% power and stir every 30 seconds. When chocolate is warm, melted and very squishy--mix it together good. Cut a very, very small hole in the corner of the baggie. Pretend like you are on Cup Cake Wars and drizzle the now cold cookies. Have fun--you get to play in your food! Let the chocolate harden and serve. Or just enjoy before they are cool--they may be messy!
This recipe was inspired by Cooking Classy a blog I found while looking at quilting blogs. I have no idea how I found it!


Tuesday, September 4, 2012

Witchy Pillow!


I've always enjoyed doing needlework. Sometimes more than others. My sweet friend introduced me to this cute pillow. I went right to the fabric store and bought a couple of kits. My daughter spent a few days with me so we started these cuties.


As with most cute projects I want to share them with my daughters and daughters in law. Before I know it I'm thinking I need to make 6 or 7 pillows. I' ve got two done--several more to make. But aren't they darling.
Better get busy!